What is a sitemap? How to create a sitemap?
-
Abdul Wadood
Have you experienced publishing a blog that doesn’t get indexed by Google even after several months?
Most of the webmasters, including myself, have gone through this situation.
Trust me; it can be frustrating to see a blog that we spent hours writing doesn’t get indexed by Google.
Google may not index a blog due to many reasons.
However, in many cases, the reason behind a blog not getting indexed is that Google didn’t discover it.
Submitting your sitemap to Google can help solve this issue.
Ok. But, what is a sitemap?
In this blog, I have explained about sitemap in detail.
Let’s get started!
Table of content:
What is a sitemap?
A sitemap is a file that contains the list of all pages and posts of a website. It helps search engines like Google to crawl and index your web pages much faster.
Sitemap files contain various information like the URL of the webpage, the last updated date of the URL, the frequency of updates, the importance of the pages within a domain, the number of image files linked to the URL, etc.
You can create a single sitemap file for your entire website. Otherwise, you can create separate sitemap files for pages, posts, and images.
Types of sitemap
There are two primary types of sitemaps.
- XML sitemap
- HTML sitemap
XML sitemap
XML sitemap provides search engines with the URLs of a website. Moreover, it helps search engines to crawl and index those URLs faster.
Here’s an example of how an XML sitemap appears.
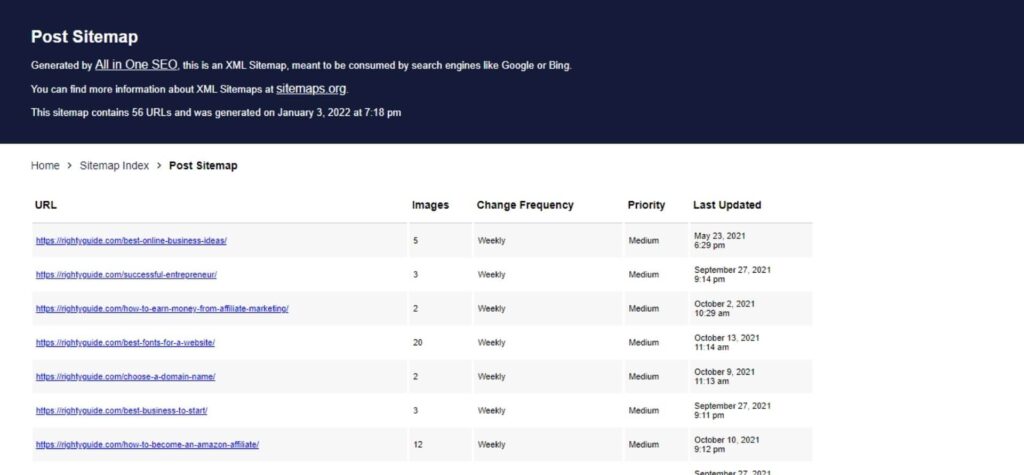
An XML sitemap is further divided into three types. I have explained them below.
- Image sitemap – You can add an image sitemap to help Google find the images on your website. If Google finds your images, it can show them in the “Images” search.
- Video sitemap – If you have video content on your website, you can add a video sitemap to help Google find them. When Google finds your videos, it can list them in the “Videos” search.
- News sitemap – If you run a news website, it’s obvious that you should have a news sitemap. If Google approves the URLs in your news sitemap, your content will be eligible to show in the “News” search.
HTML sitemap
HTML sitemaps help users to navigate across your website.
Here’s an example of the Samsung website’s HTML sitemap.
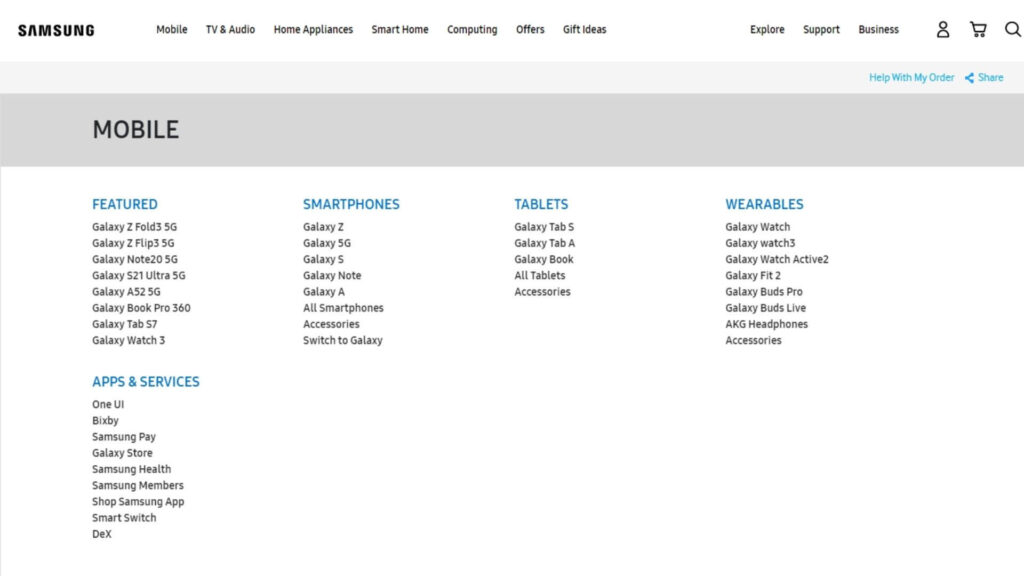
As you can see in the image, the HTML sitemap is a visual representation of a website. Though Samsung’s website is huge, you can get a rough idea about the pages just by seeing the HTML sitemap.
Ok.
Search engines primarily consider the XML sitemap for crawling webpages.
However, HTML sitemaps help to provide a better user experience. It helps organize the pages of your website and helps users find what they’re looking for quickly.
If you have a large website with lots of resources, I recommend creating both XML and HTML sitemaps.
Is sitemap important?
YES! Sitemaps are important.
Sitemaps help search engine bots crawl and index your web pages.
Google crawlers use links to find new web pages. If your website is new, you won’t have many backlinks. This will make it difficult for Google to find your web pages.
On the other hand, if your website is massive and contains lots of pages, Googlebot may miss discovering some pages. If you have a sitemap, you can help Google discover the pages and index them.
How to create a sitemap?
As explained above, there are two types of sitemaps; XML sitemap and HTML sitemap. Below, I’ll explain the procedure to create both of them.
Procedure to create an XML sitemap
The following are the methods of creating an XML sitemap.
1. By using WordPress plugins
If you have a WordPress website, you can use SEO plugins like All in One SEO, Rank Math SEO, etc., to create sitemaps.
Below, I have demonstrated the procedure to create an XML sitemap with the All in One SEO plugin.
- Install and activate the All in One SEO plugin.
- In your WordPress dashboard, click on “All in One SEO”, which appears in the left-hand side menu. Next, click on “Sitemaps”.

- Check whether the “Enable Sitemap” option is switched on. You can click on “Open Sitemap” to view the sitemap.

If you use other Content Management Systems (CMS), there will probably be an application or plugin that will let you create the sitemap for your website.
If you created your website manually through coding, you can opt for the methods I explained below to create an XML sitemap.
2. By using a third-party tool
You can use sitemap generators like XML-Sitemaps to create the sitemap for your website. Here’s how to do so.
- Go to the XML-Sitemaps website.
- Enter your website URL in the box and click “Start”. This will start the crawling process.

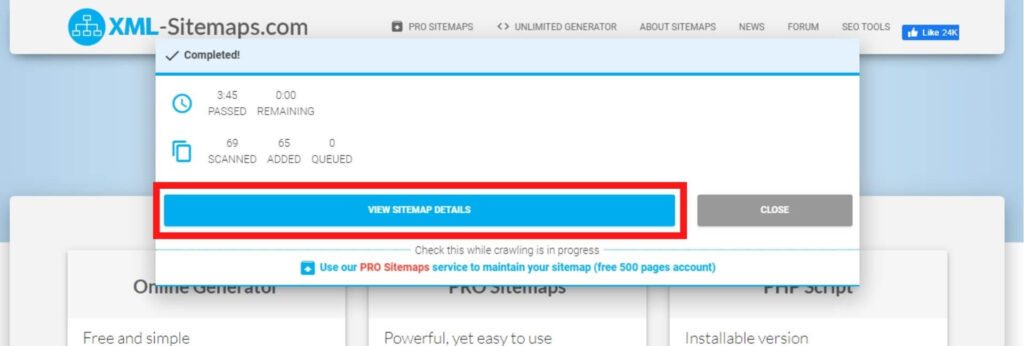
- Click on “View Sitemap Details” to view the sitemap.
- Click on “Download your XML Sitemap File” to download your sitemap file.
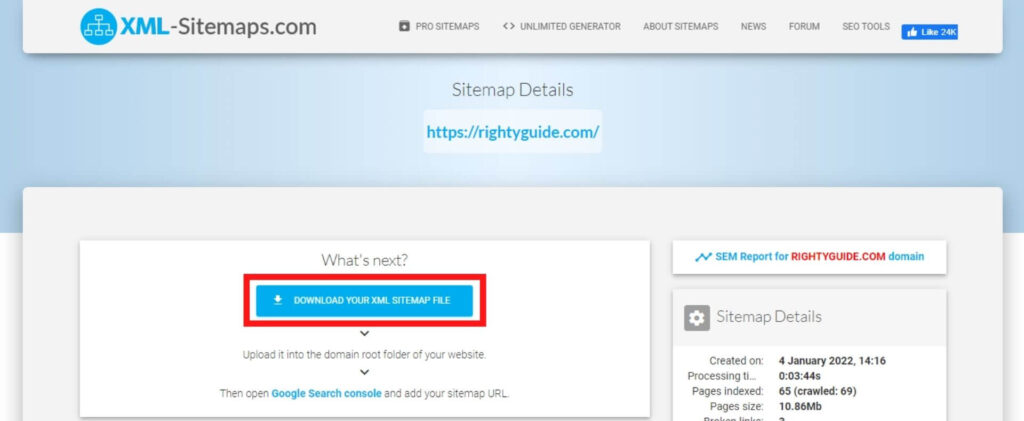
- Upload the file to the domain root folder of your website.
Once you upload the sitemap to the root folder of your website, you can access it at “example.com/sitemap.xml”.
3. By manual method
XML sitemap file can be created manually by adding the required information in the following format.
You can use an editor application like Notepad to create the sitemap file.
The file extension should be “.xml”. You can name the sitemap file as “sitemap.xml” or “sitemap_index.xml”.
All XML sitemap files begin with <urlset> tag and end with </urlset>tag.
In the sitemap file, enter the URLs of your website that you want search engines to index.
Ok.
Below, I have listed the important elements you should add for each URL in the sitemap file.
- The location of any webpage can be added to the sitemap file using the syntax, <loc>http://www.domainname.com//slug</loc>
- The last modified date can be added to the sitemap file using the following syntax, <lastmod>2022-01-03</lastmod>.
- The frequency of any webpage update can be specified using the following syntax, <changefreq>monthly</changefreq>. Depending on your requirement, you can replace the “monthly” frequency option with “never”, “yearly”, “weekly”, “daily”, “hourly”, and “always”.
- The priority of any webpage within the domain can be specified using the following syntax, <priority>1</priority>. Priority values from 0.8 to 1 indicate high priority URLs like Homepage, product information pages, category pages, subdomains, etc. Priority values from 0.4 to 0.7 can be used for less important URLs like blog posts, sub-category pages, FAQ pages, etc. Priority values from 0.0 to 0.3 indicate outdated information that is no longer relevant.
Ok.
Once you create the sitemap file, you should save it on your computer. Next, upload it to the root folder of your website.
Once done, you can access your sitemap at “example.com/sitemap.xml”.
Note: Creating the sitemap manually can be time-consuming. If you aren’t using a Content Management System (CMS), I personally will recommend you use sitemap generators like XML-Sitemaps to create the sitemap for your website.
Procedure to create an HTML sitemap
An HTML sitemap is a page that contains links to all important pages on your website.
To create an HTML sitemap, all you need to do is create a new page and add the links to the pages of your website.
That’s it!
You can publish that page on your website as a “sitemap”. Next, submit that page to Search Console for Google to index it.
How to submit the sitemap to Google Search Console?
Once you create your sitemap, you can submit it to Google through Search Console.
Here are the steps to do so.
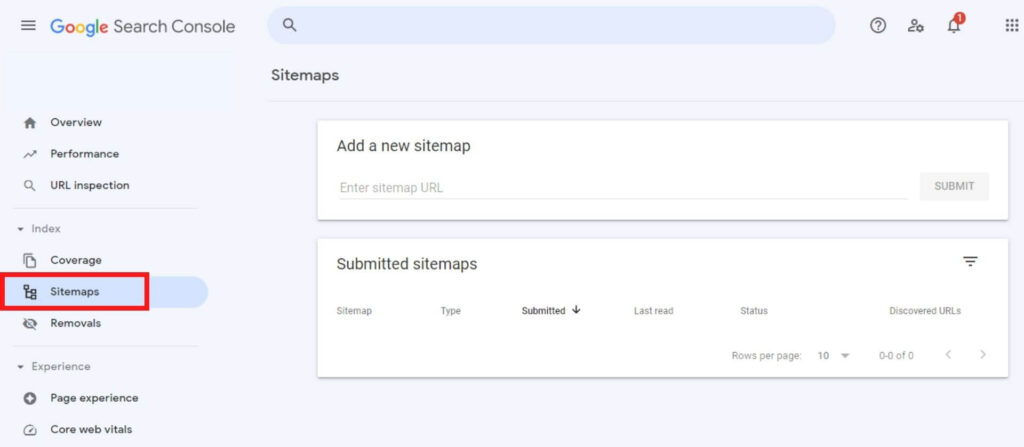
- Go to Google Search Console.
- Click on the “Sitemaps” option appearing in the left side menu bar.
- Type your website’s sitemap URL and click “Submit”.
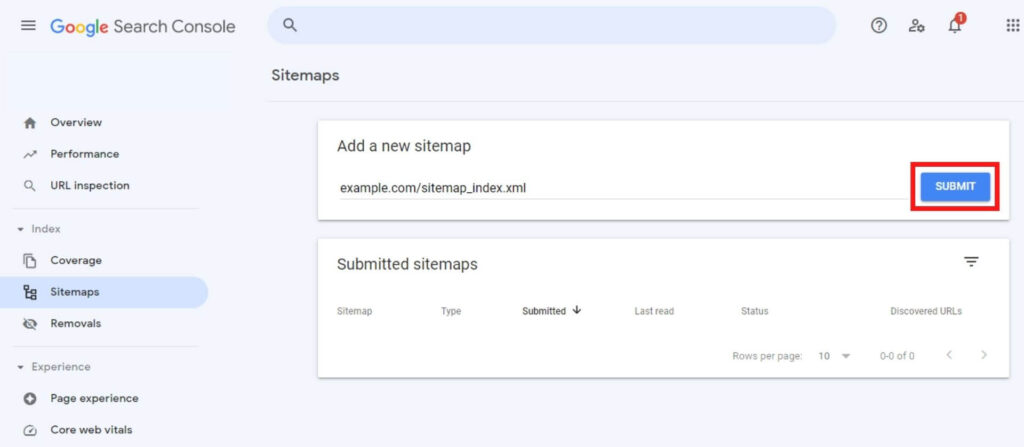
Note: Regardless of the method you use to create your sitemap, you should ensure to submit it to Search Console for Google to view it.
Conclusion
A sitemap is important as it helps search engines find the pages of your website. Moreover, sitemaps give other information about your pages to search engines like the last updated date of the URL, frequency of updates, etc.
As explained in this blog, you can create sitemaps using different methods. Once you create the sitemap, you can submit it to Google through Search Console.
Ok. I hope you found this blog beneficial. If you have any doubts, let me know in the comment section below.
