How to set up Google Search Console?
-
Abdul Wadood
If you want to get your website indexed and know its performance in the search results, you should submit it to Google Search Console.
But, how to set up Google Search Console?
It’s pretty easy!
In this blog, I have provided a detailed explanation to help you set up Google Search Console and add your website to it.
Table of content:
What is Google Search Console?
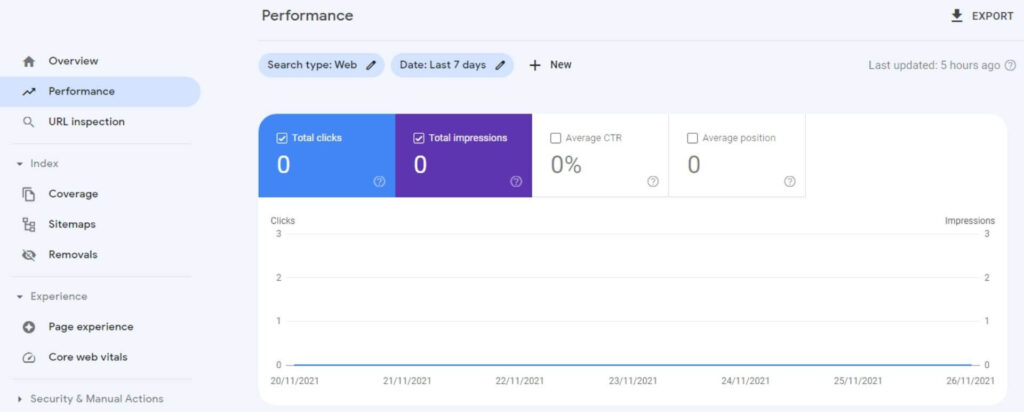
Search Console is a free SEO tool from Google that helps get your website indexed and analyze your website’s performance.
Though Search Console is free, it’s one of the most advanced SEO tools out there.
Using Search Console, you can get an accurate and up-to-date report on your website’s organic search performance.
Since Search Console is a tool from Google, it acts as a way through which Google communicates with the website owners.
Setting up Google Search Console
Now, let’s see how to set up Google Search Console and add your website to it.
Step #1: Sign to Google Search Console
The first step in setting up Google Search Console is to sign in to it.
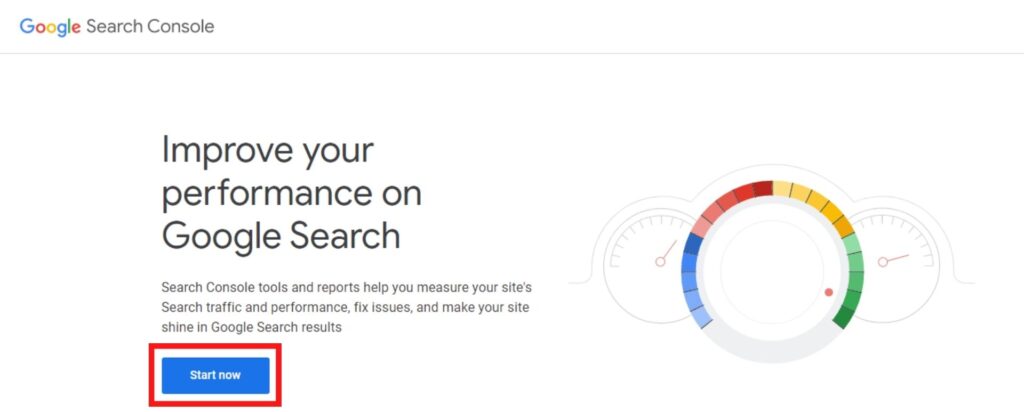
You can sign in to Google Search Console using your Google account.
Step #2: Add your website property
Now that you have signed in to Search Console, you can add your website through “Domain” or “URL prefix” options.
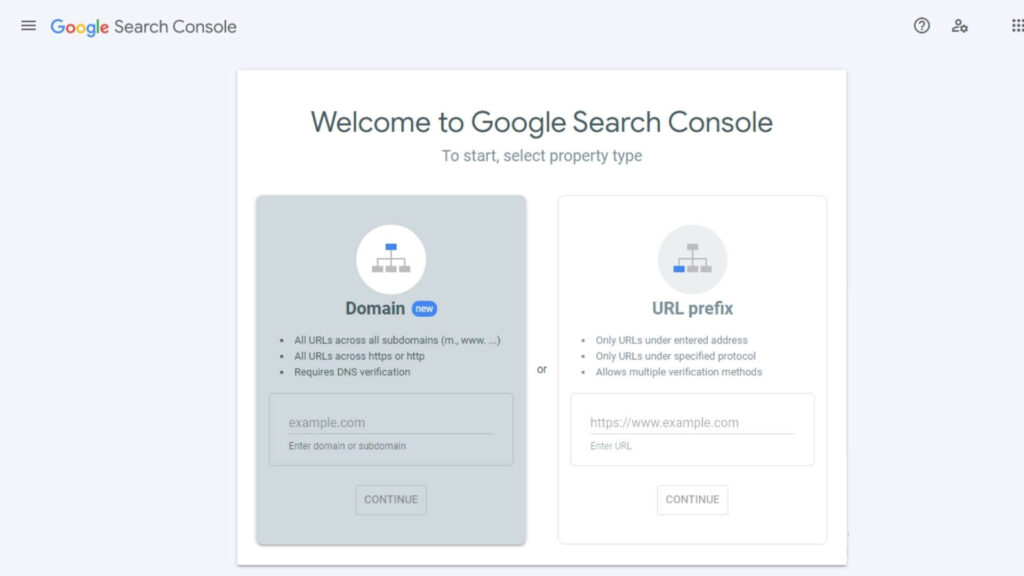
Here’s the difference between domain property and URL prefix property that you should note.
- Domain property: If you add your website as a domain property, Google can track your entire website, including various subdomains and protocols.
- URL prefix property: If you add your website as a URL prefix property, Google can track only the URL you specify. For instance, say that you have added the URL http://example.com/sample on Search Console. In this case, different variations of the URLs like https://example.com/sample or http://www.example.com/sample won’t be tracked.
I recommend adding your website as a “Domain” property because by doing so, you’re allowing Search Console to track your entire website.
If you want Search Console to track only a particular URL, you can add your website as a “URL prefix” property.
Note: If you add your website as a “URL prefix” property, you should also add variations of that URL to get accurate tracking data. For instance, if you’re adding the URL https://example.com/sample-page, make sure to add the following variations.
- http://example.com/sample-page
- https://www.example.com/sample-page
- http://www.example.com/sample-page
Step #3: Verify your website
If you want Search Console to start working and gather data from your website, you should confirm that you’re the owner of the website.
You can verify the ownership of your website either using the domain property or the URL prefix property method. I have explained them below.
Verification process for domain property
If you add your website as a domain property, you can verify the ownership of your website through your DNS (Domain Name System) provider. Here’s the procedure to do so.
First, click on the “Instructions for” drop-down menu and check whether your domain name service provider is listed.
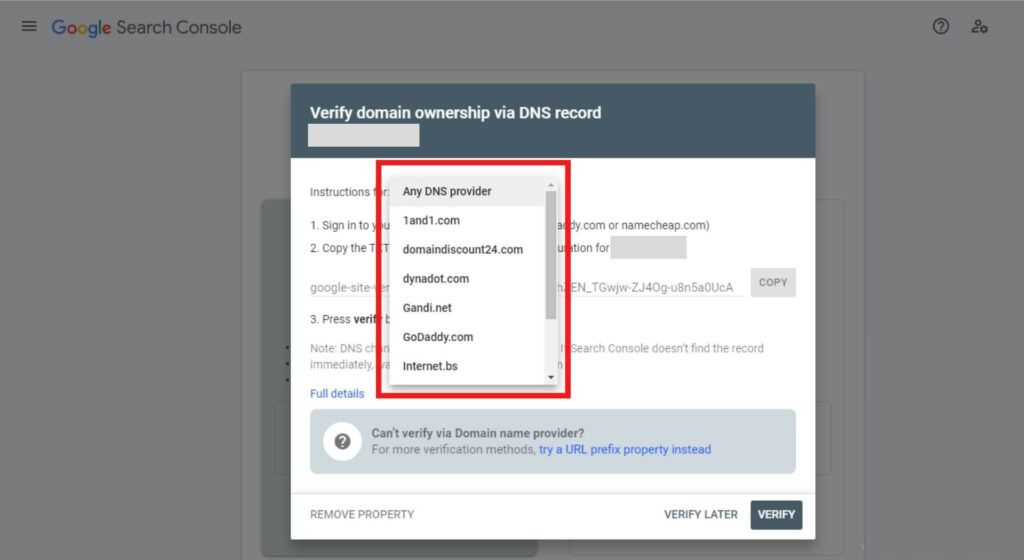
If your domain name service provider is listed, you can click on it and click “Start Verification”.
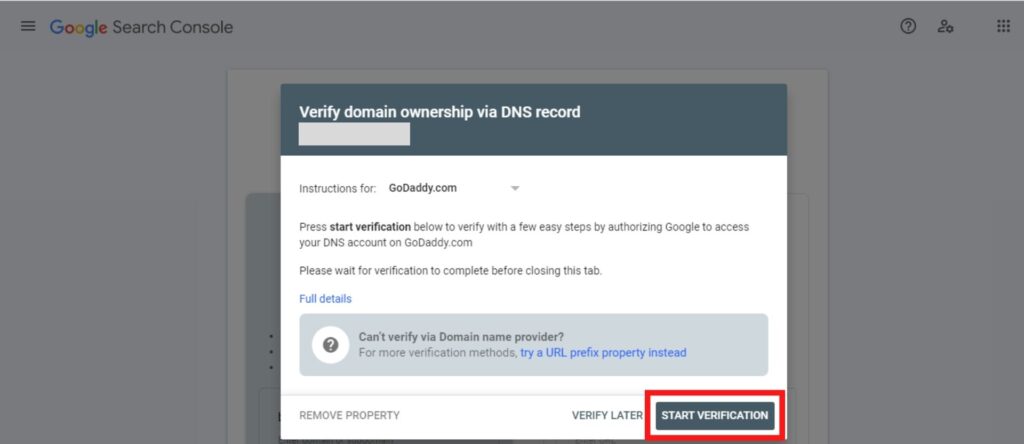
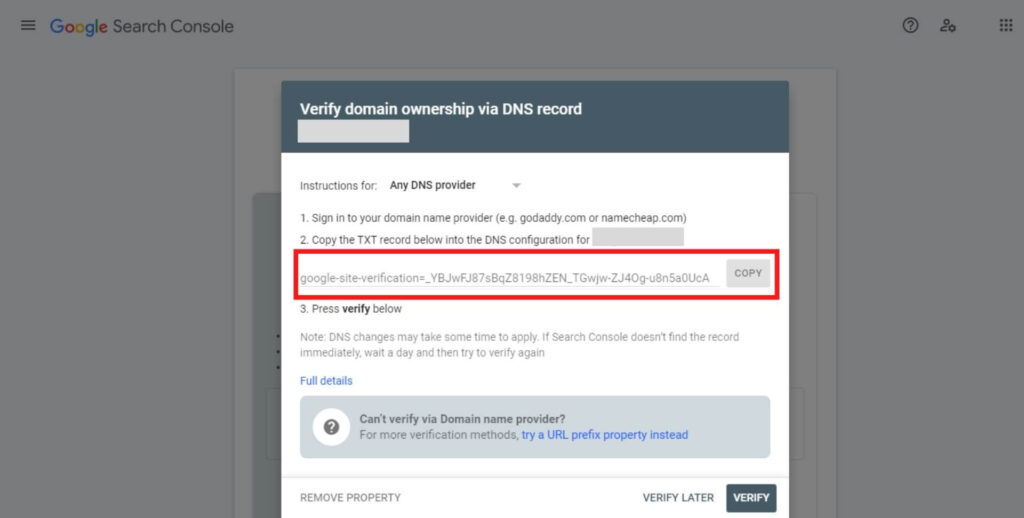
If otherwise, you can leave the option as “Any DNS provider”.
Ok.
Next, copy the TXT record and sign in to your domain name service provider dashboard.
I got my domain name through HostGator, which is a web hosting service provider. So, I’ll demonstrate the process of adding the DNS record using HostGator. If you use other domain name service providers, the procedure to add the DNS record will still remain pretty much the same.
I got my domain name through HostGator because they provide a free domain name for a year along with their yearly plans.
Alright! Now, let’s get back into the topic.
I’ll go to the DNS Zone Editor to add the TXT record. Under the “Add a Record” section, I can add the TXT record.
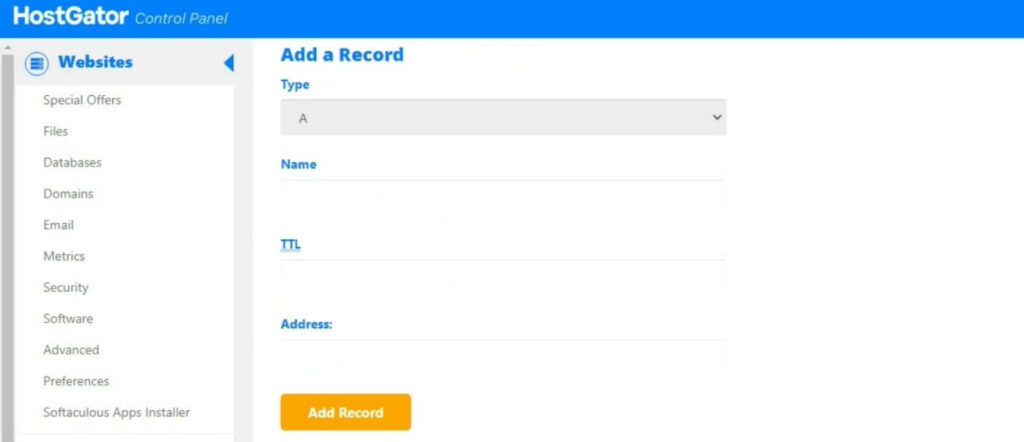
From the drop-down options, I’ll select the ‘Type’ as “TXT”. In the ‘Name’ option, enter your domain name.

In the ‘TTL’ option, enter “3600”. If you’re using other domain name provider services, you can leave the TTL value as default. Otherwise, you can set it to “1 hour” or “3600 seconds”.

In the ‘TXT Data’ option, paste the TXT record you copied from Google Search Console.

Once done, click on “Add Record”.
If your domain name service provider asks for the ‘Host’ option, you can enter the value as “@”.
Ok. Now, you can go back to Google Search Console and click “Verify”.
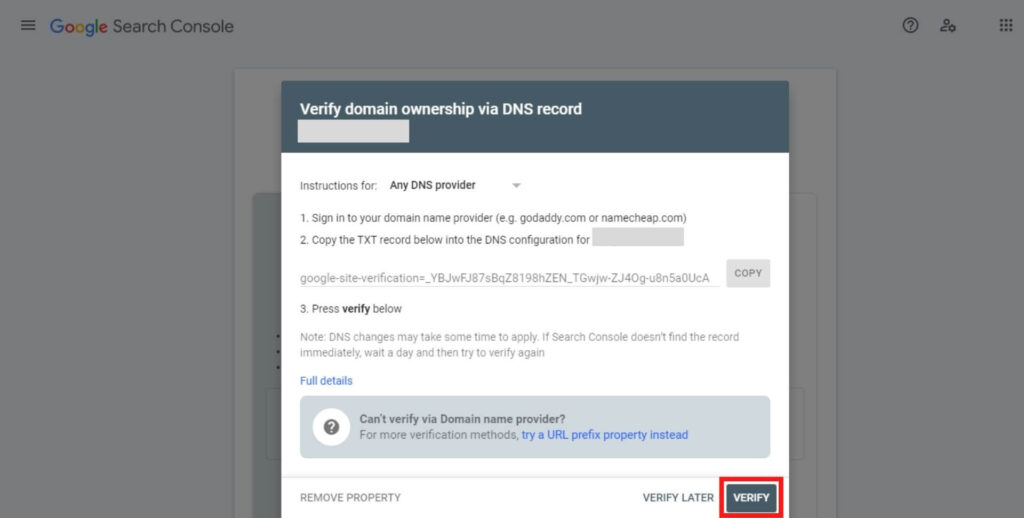
If you have completed all the steps correctly, you’ll receive an “Ownership verified” message.
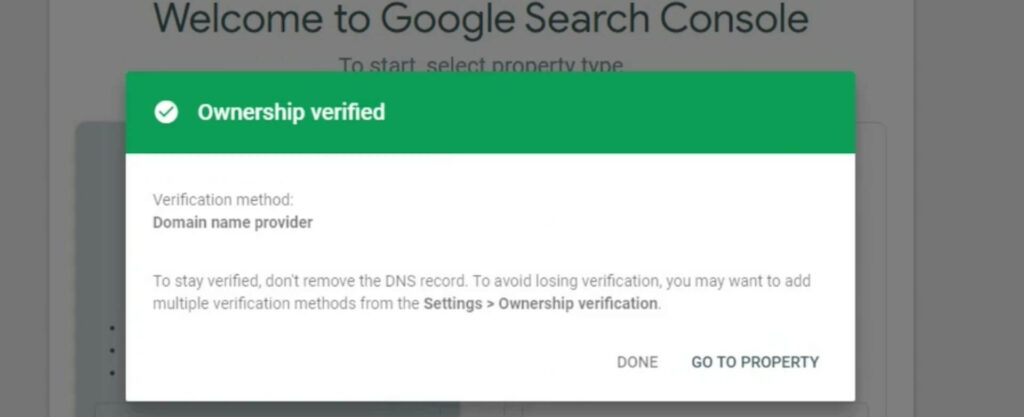
Be noted that DNS records may take about 72 hours to get updated. So, if your website ownership isn’t verified immediately, you can check again after a few hours.
Verification process for URL prefix property
If you add your website as a URL prefix property, you can verify the ownership through HTML file, HTML tag, Google Analytics, Google Tag Manager, or Domain name provider.
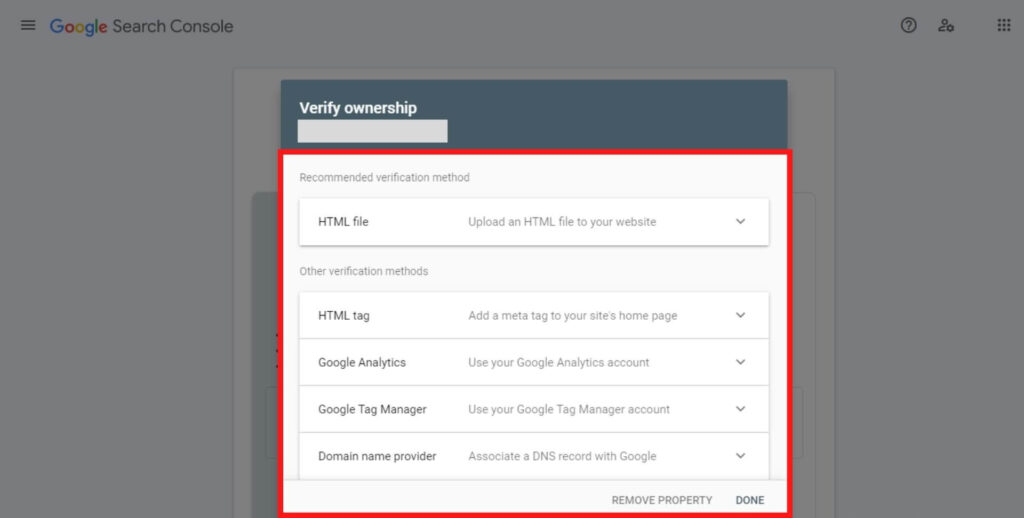
However, Search Console recommends verifying the ownership using the HTML file method.
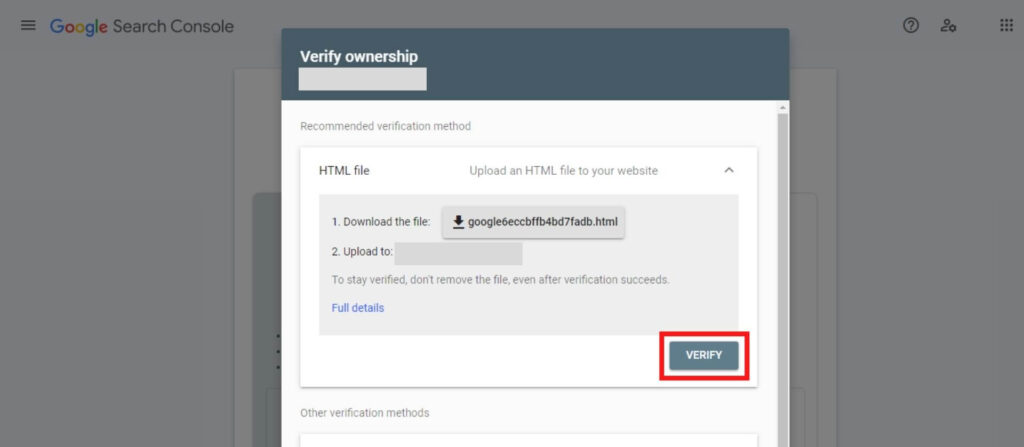
HTML file
In this method, you have to first download the HTML file.
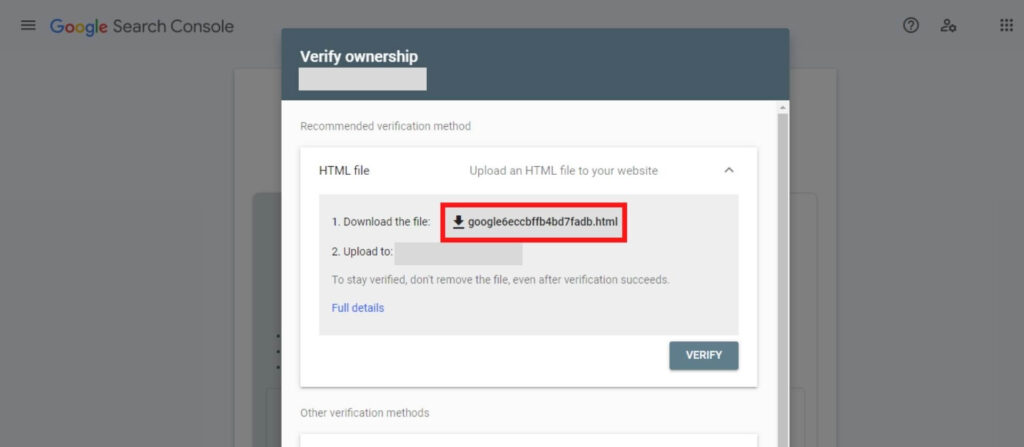
Once downloaded, you can add it to your website’s server through the cPanel. Here are the steps to do so.
- Login to your hosting provider dashboard and go to the control panel (cPanel).
- From the cPanel, go to the “File Manager”.
- Click on “public_html” that appears in the side menu.
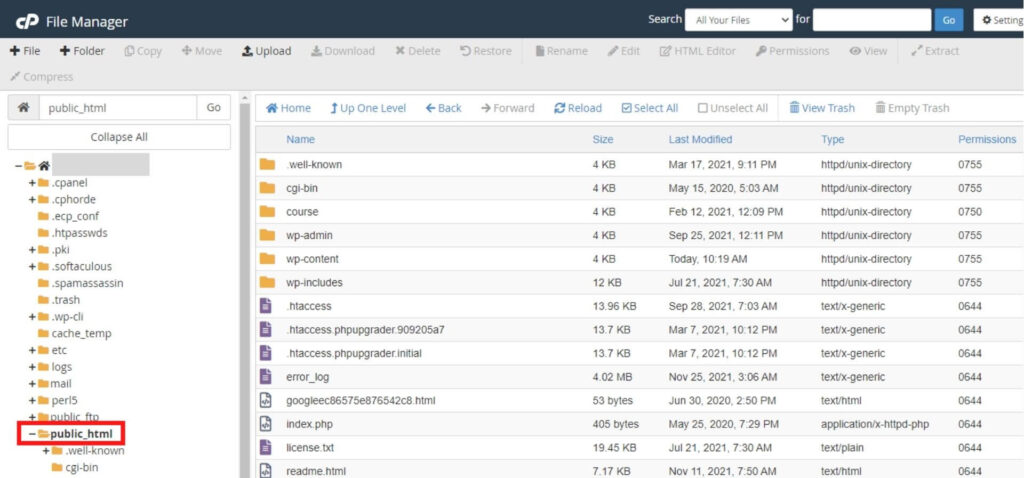
- Click “Upload” and select the file from your computer to upload the file.
- Once done, go back to Google Search Console and click “Verify”.
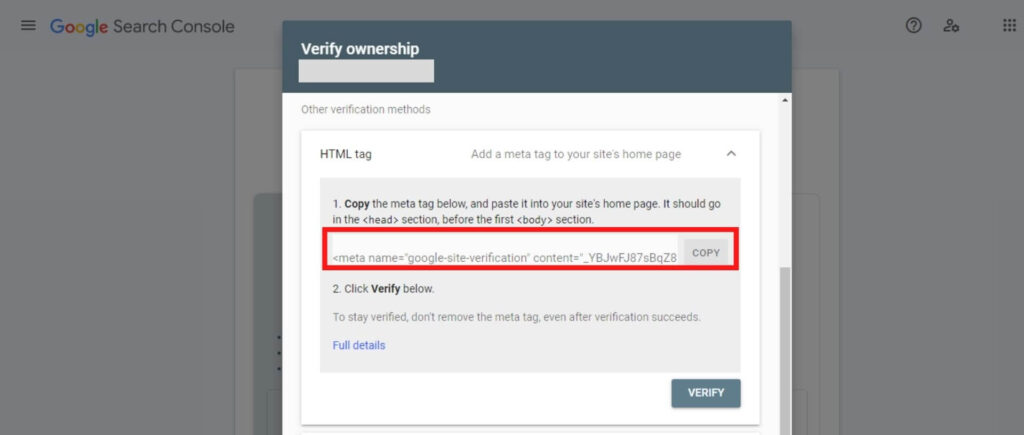
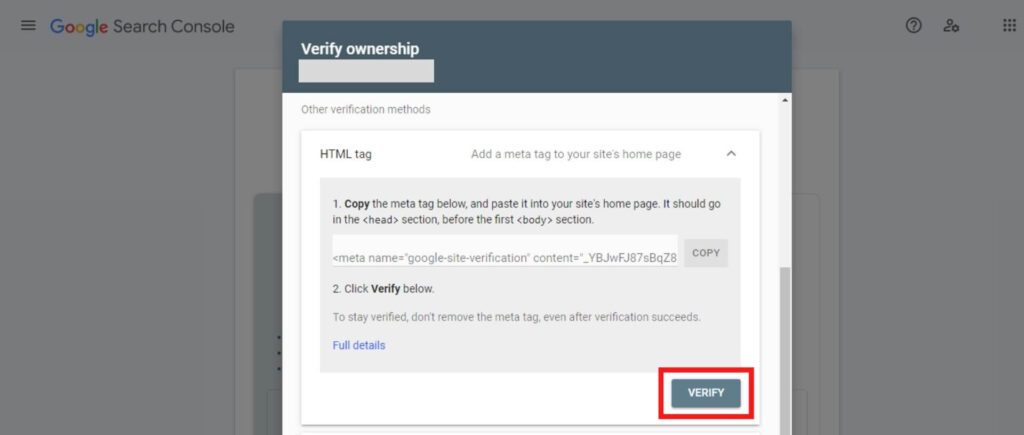
HTML tag
If you want to verify the ownership using the HTML tag, you should copy the tag from Search Console and paste it in the <head> section of your website.
If you’re using WordPress, you can add the HTML tag to your website theme’s header.php file. However, note that when you change your theme, the code will be removed.
You can also use SEO plugins like All in One SEO to add the HTML tag to your website. If you use this method to add the HTML tag, the code won’t be removed when you change the theme of your website.
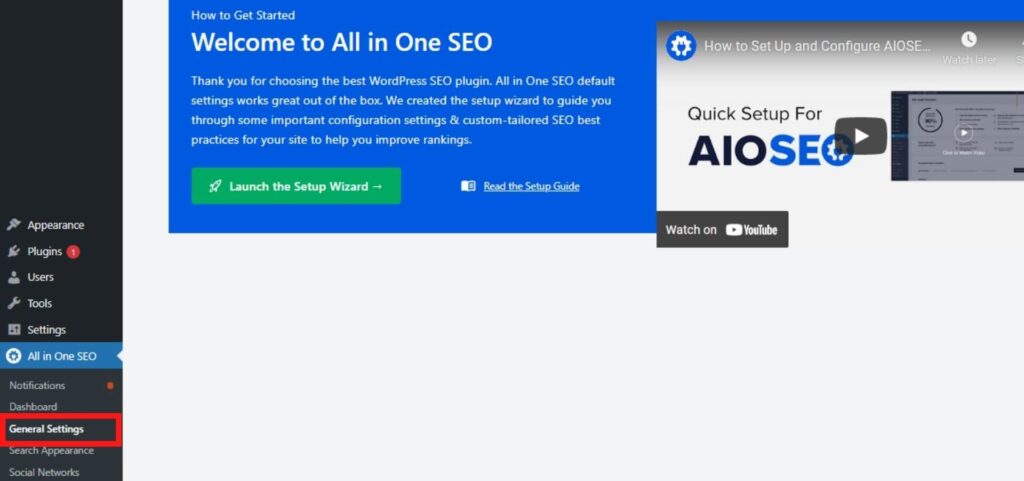
Here’s how you can add the HTML tag using the All in One SEO plugin.
- First, you have to install and activate the All in One SEO plugin.
- In the left-hand side menu of your WordPress dashboard, click on “All in One SEO”. Next, click on “General Settings”.
- From the general settings page, click on “Webmaster Tools”. Next, you can paste the code you copied in the Google Search Console box.
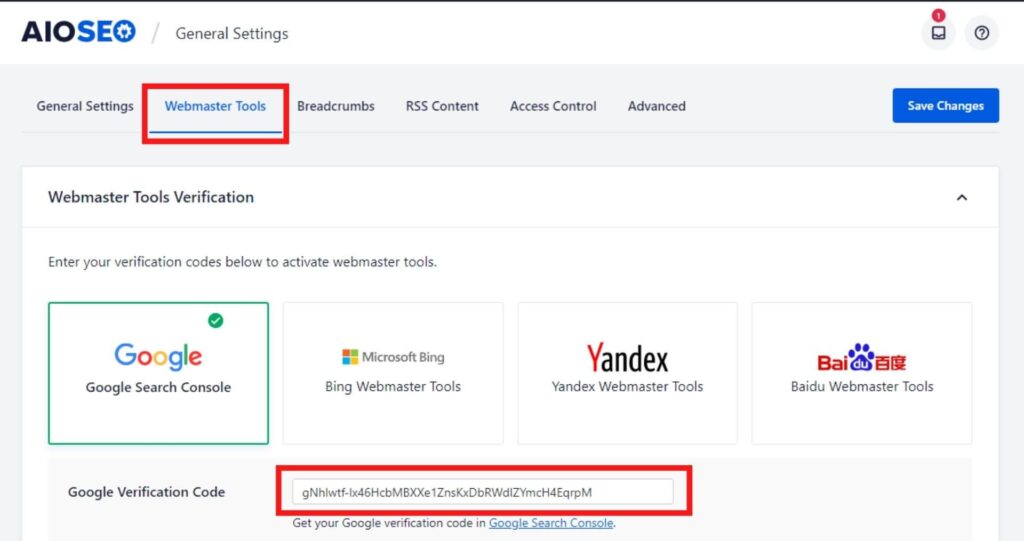
- Click on “Save Changes”.
Go back to Search Console and click “Verify”.
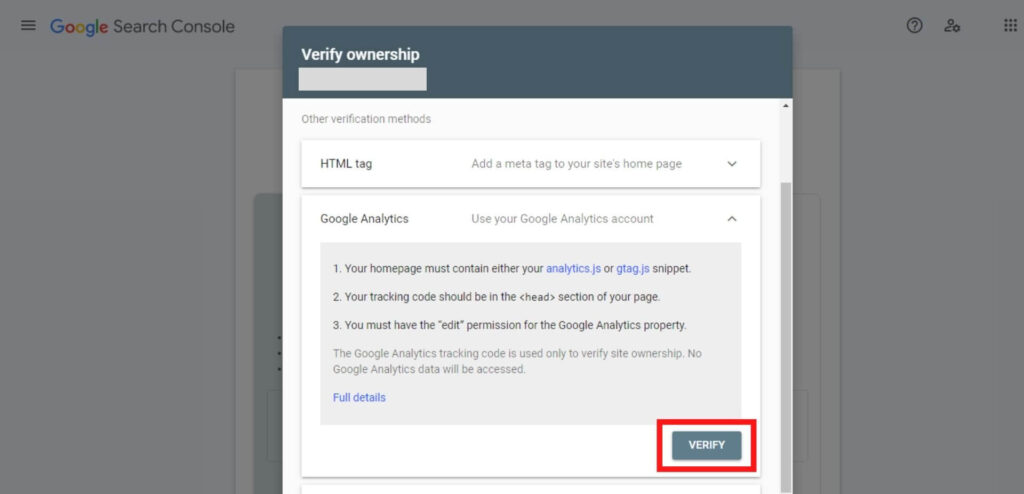
Google Analytics
If you’re already using Google Analytics on your website, you can use it to verify the URL prefix property.
All you need to do is expand the Google Analytics instruction box in Search Console and click “Verify”.
Google Tag Manager
If you’re using Google Tag Manager on your website, you can use it to verify the URL prefix property.
Just expand the Google Tag Manager instruction box in Search Console and click “Verify”.

Domain Name Provider
You can refer to my above demonstration to know how to add a DNS record.
In my opinion, if you want to verify the URL prefix property using the domain name provider, I’d rather suggest you opt for “Domain” property verification because doing so will let Search Console track your entire website.
Ok. I hope you got a clear idea of how to set up Google Search Console.
How to submit sitemap to Google Search Console?
Sitemaps are a list of the pages or posts on your website. By submitting the sitemap of your website to Search Console, Google can index your web pages much faster.
Also, sitemaps help Google to understand the structure of your website better.
Generally speaking, Google can find your web pages without you having to submit the sitemap.
But, if your website is new, your website may not have sufficient backlinks. In this case, the bots of Google may not be able to discover the pages or posts you publish.
On the other side, if your website is massive with lots of web pages, Google’s bots may miss discovering some pages.
Submitting the sitemap to Google Search Console can help solve this issue to a great extent.
Ok.
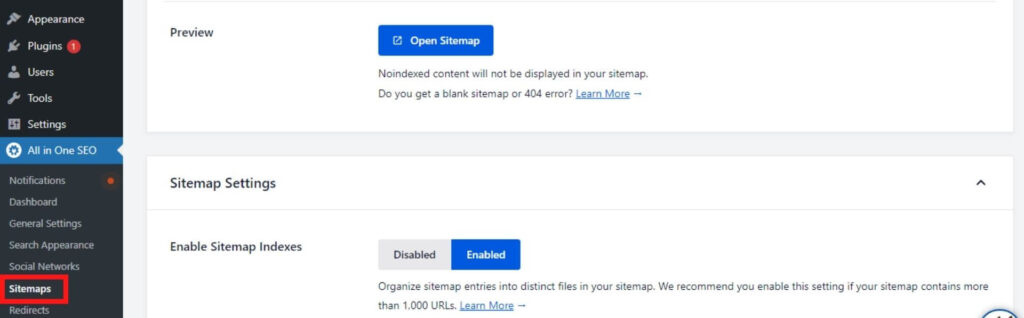
If you’re using WordPress, you can use the All in One SEO plugin to create the sitemap for your website. Here’s how to do so.
- Go to your WordPress dashboard. In the left-hand side menu, click on “All in One SEO”. Next, click on “Sitemaps”.
- Make sure the “Enable Sitemap” option is on.
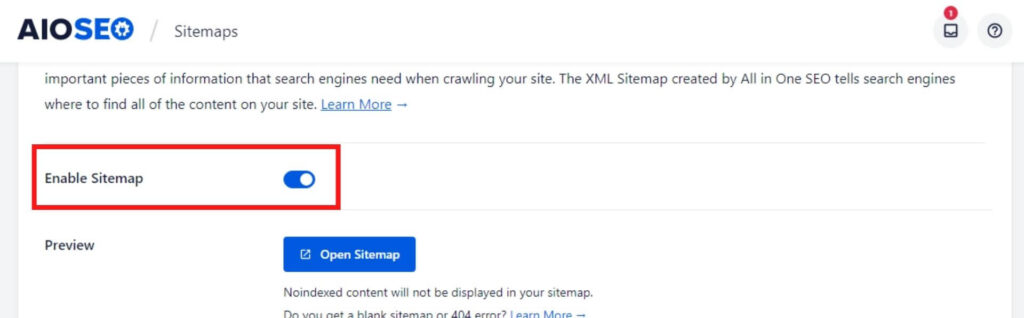
- Click on “Open Sitemap” to view your sitemap.
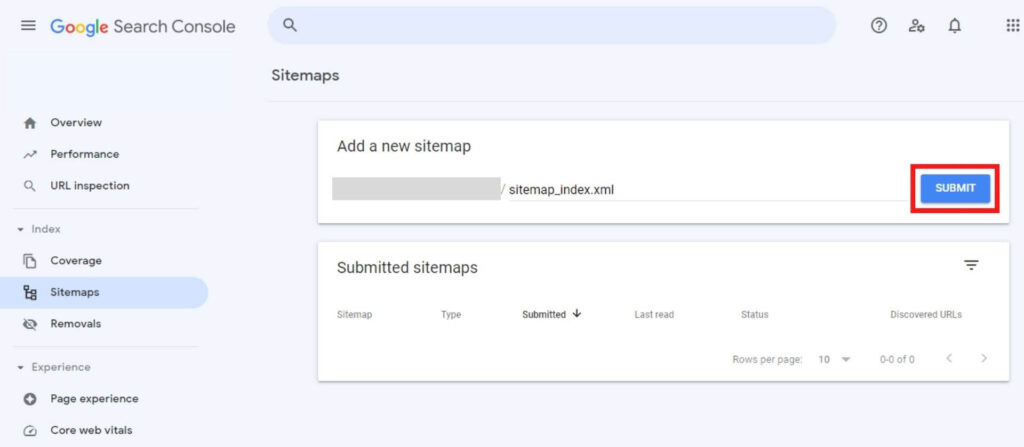
Now, you can go to Google Search Console and add the sitemap of your website. Here’s how to do so.
- In the left-hand side menu, click on “Sitemaps” appearing in the “Index” section.

- In the “Add a new sitemap” box, type your website’s sitemap URL and click “Submit”.
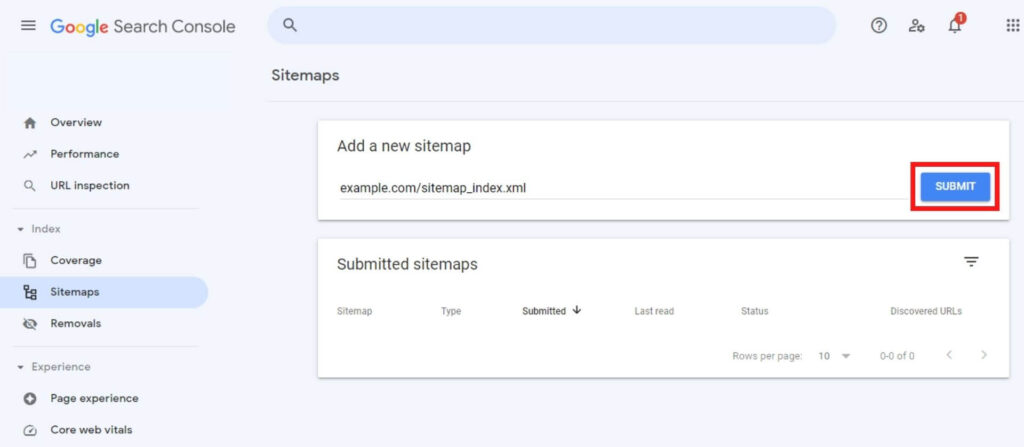
Note: If you have added your website as a “URL prefix” property, you can type “sitemap_index.xml” to complete the sitemap URL.
Conclusion
If you have a website, you can make use of Google Search Console to improve your website’s indexing ability and analyze its performance.
Setting up Google Search Console is pretty easy. You can follow the steps mentioned in this blog to set up Search Console and add your website.
If you add your website as a “Domain” property, Search Console can track your entire website. While, if you add your website as a “URL prefix” property, Search Console will be able to track only that specific URL.
Once you finish the setup process of Search Console, you can submit the sitemap of your website to Search Console to make Google crawl and index your web pages much faster.
