How to create a website with WordPress: Step-by-step guide
-
Abdul Wadood
Are you interested to learn the method to create a website?
If so, you have arrived at the right place.
Nowadays, creating a website has become super easy to the extent where you can create a website in just 10 minutes, thanks to website builders like WordPress.
Below, I have listed the topics that we will be covering in this blog. I recommend everyone to read this entire blog, but if you came here looking for a particular thing, you may select that topic from the various topics listed below in the table of content.
Steps to create a website:
1. Host your website
To get started with creating a website, you will need a domain name and web hosting.
Web hosting and domain name can be purchased from a platform called HostGator. HostGator is one of the best and reputed web hosting companies. Moreover, if you opt for their yearly plans, the domain name will be free of cost for a year.
Now, you might wonder what a domain name and web hosting is?
Good question!
A domain name is the address of your website on the internet. It represents you and your brand.
Web hosting service providers will make your website accessible to people. In simple terms, your website will be hosted on the servers of your web hosting provider for the people to access it.
A few tips to choose a good domain name:
- Easy and brandable: The domain name you choose should be easy for people to remember. Moreover, it should be brandable too! To achieve this, you should go for a short domain name instead of opting for a domain name stuffed with keywords. For example, basketballskillsanddrills.com is stuffed with keywords, which makes it difficult to read itself, let alone remember.
- Avoid hyphens and numbers: Your domain name should not contain hyphens or numbers. Adding a number or hyphen in your domain name will make it difficult for people to type and spell.
- Choose “.com” domain extensions: If you ask me, I will always suggest anyone opt for the “.com” domain name extension. It is the most popular extension on Google and it is also easy to remember. Moreover, many smartphone keyboards, by default, come with a “.com” button. This alone is sufficient to prove the popularity of the “.com” domain extension.
- Stay away from weird domain names: Weird domain names are the ones that have a common word with a different spelling or double letters. Weird domain names increase typing errors, and it also makes the name more difficult to remember. For example, when a person says a domain like comfyysleep.com, there is a high chance for the listener to misunderstand it as comfysleep.com.
Ok!
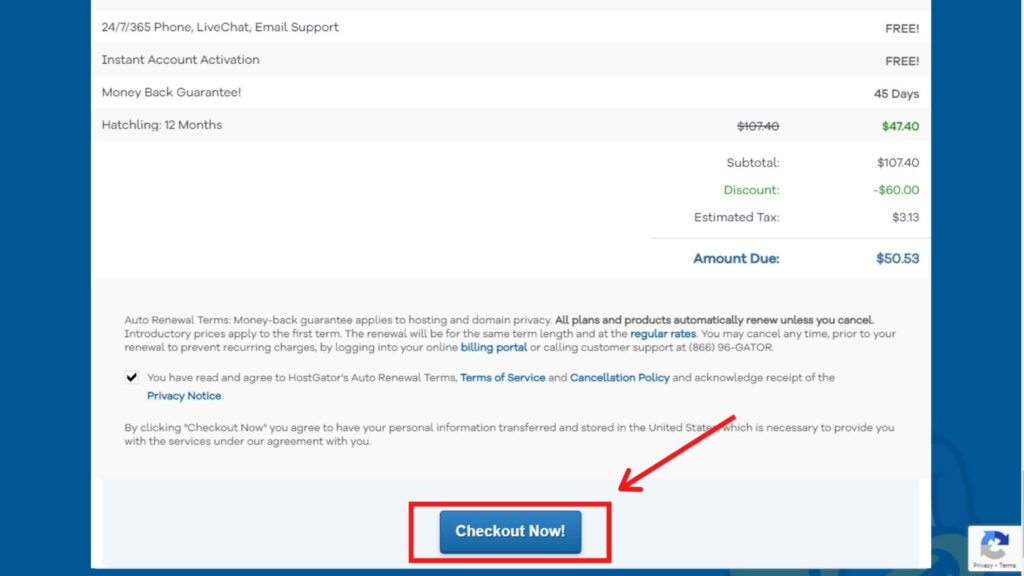
If you are a complete beginner, I recommend you to opt for the Hatchling plan as it would be way more than sufficient.

After you click on ‘Buy Now’, it will take you to the checkout page, where you need to fill in the necessary information, and click on ‘Checkout Now’.
Once you have purchased HostGator, it will take you to a page similar to this.
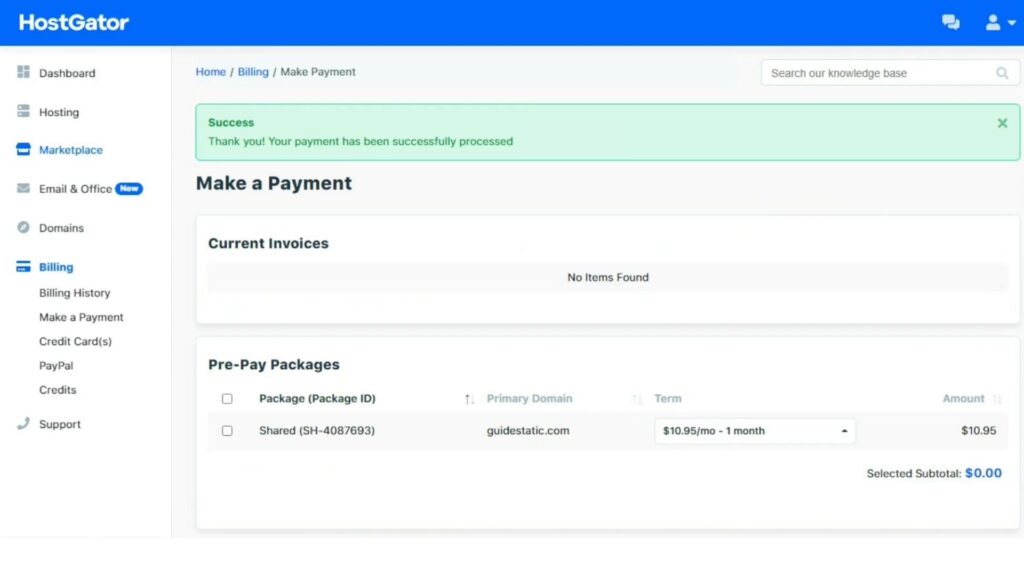
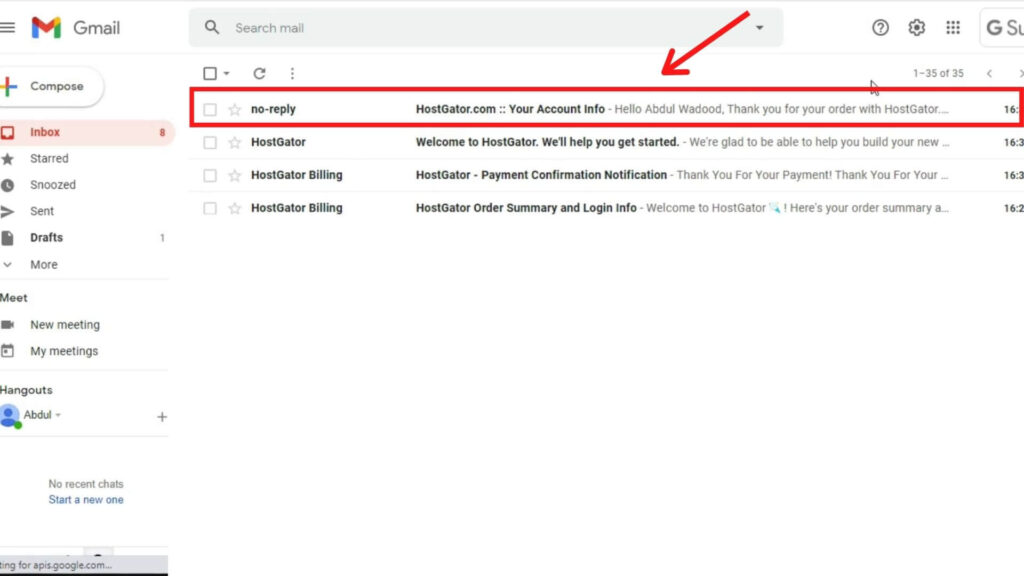
Now, open your email. You would have received the login credentials on the mail address that you have provided to HostGator during checkout. Using the credentials, login to the control panel.
2. Install WordPress
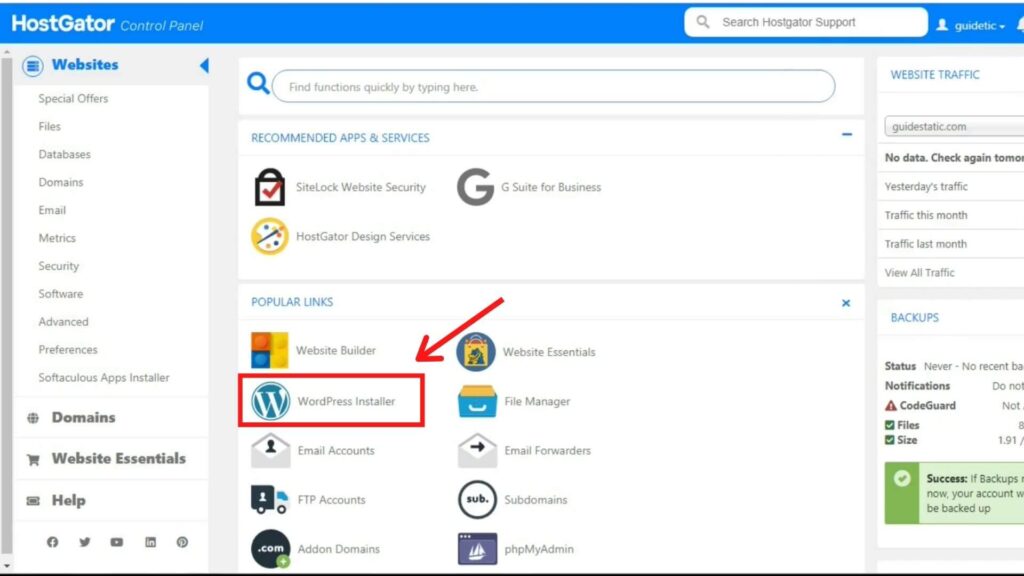
In the HostGator Control Panel, under ‘Popular Links’, click on ‘WordPress Installer’.
This will take you to the Softaculous from where you can install WordPress.
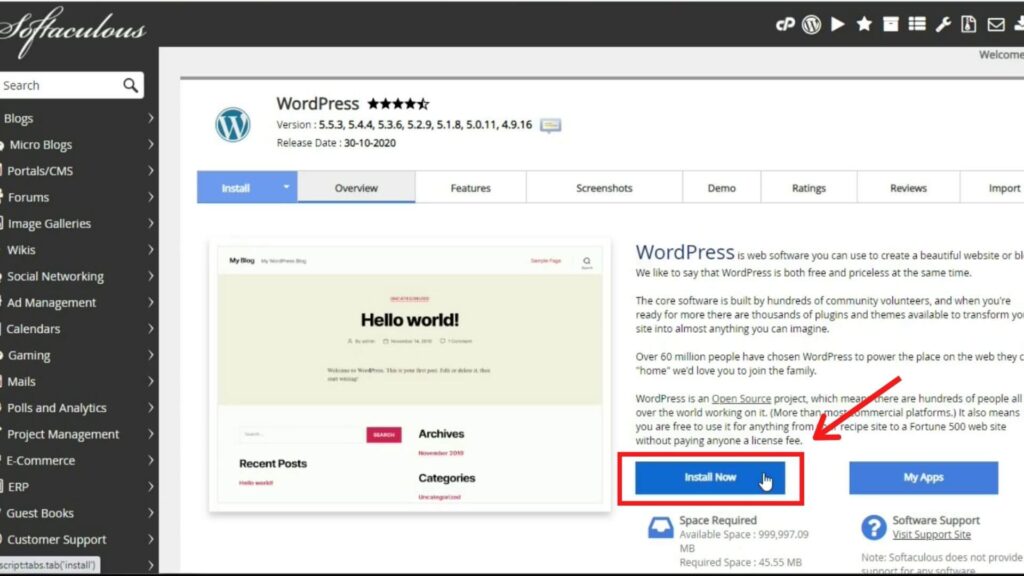
Fill in the details, and click on ‘Quick Install’.
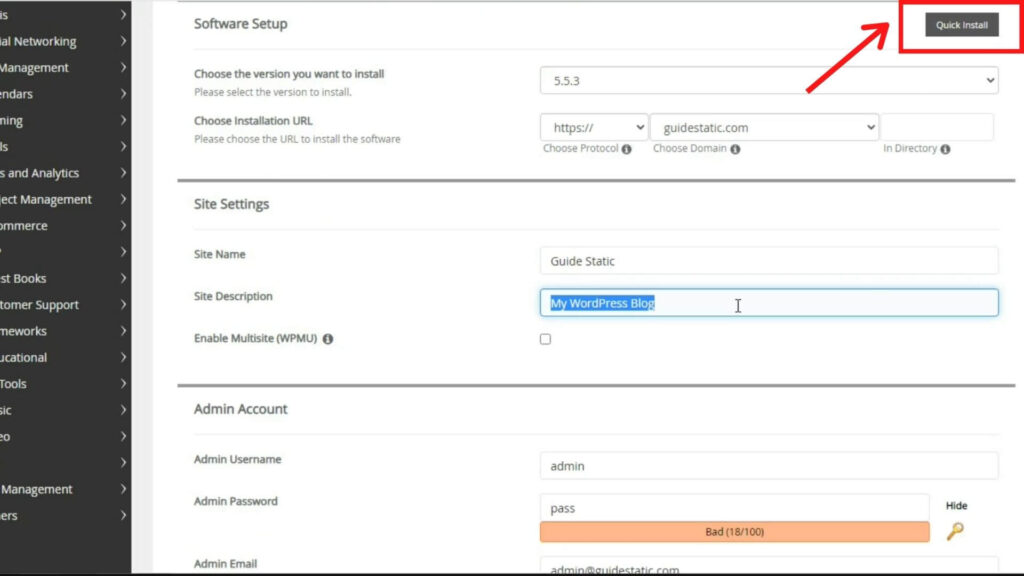
This will install WordPress to your website.
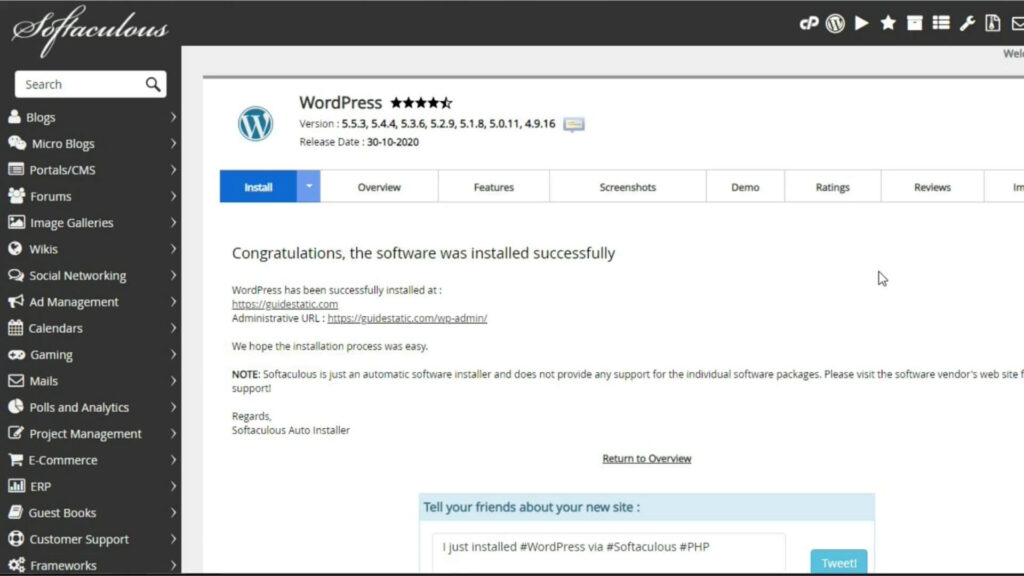
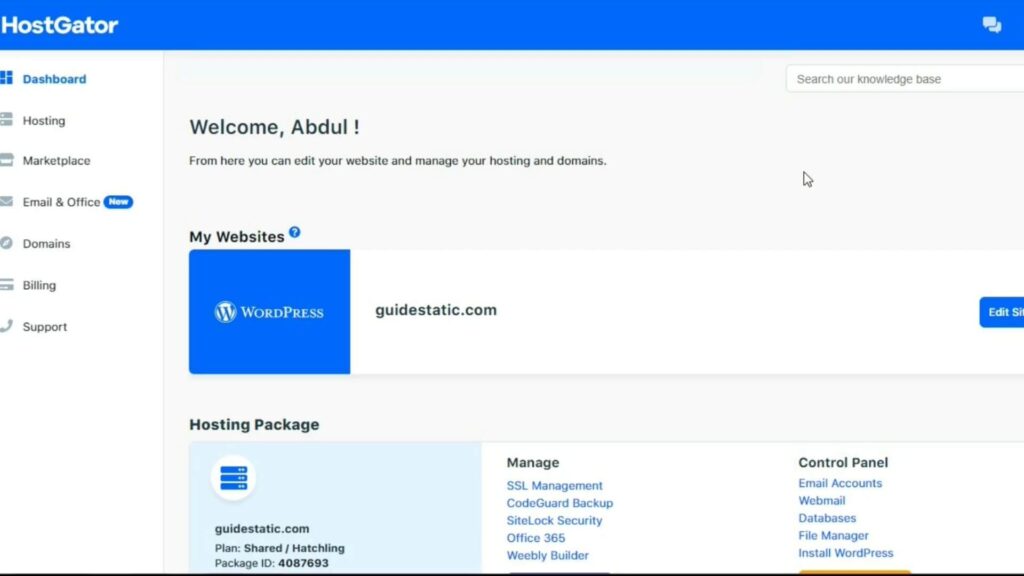
Now, come back to the HostGator dashboard to link our WordPress website with HostGator’s dashboard.
Click on ‘Create Website’. HostGator will detect your website, and it will be linked.
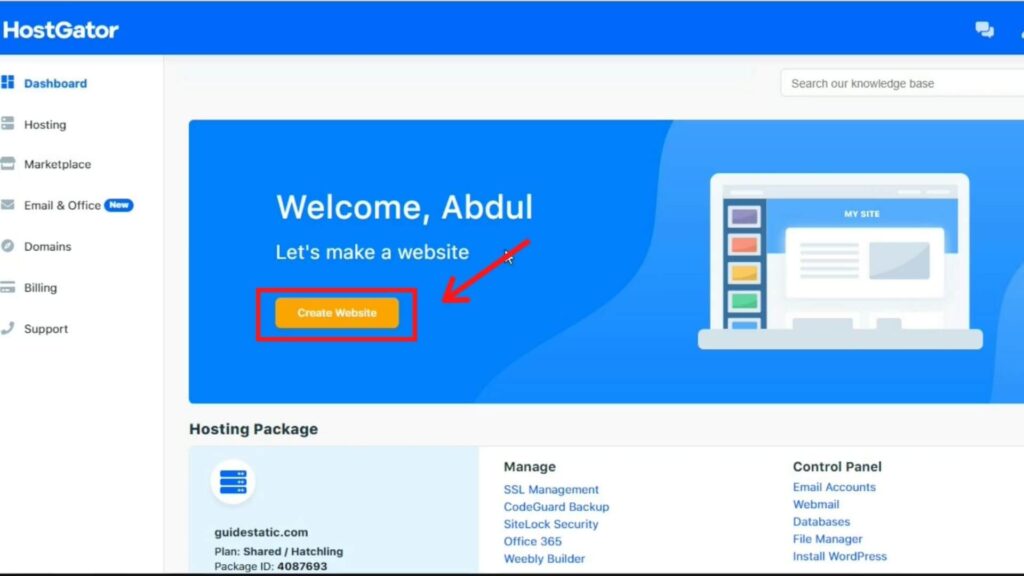
The website is linked successfully!
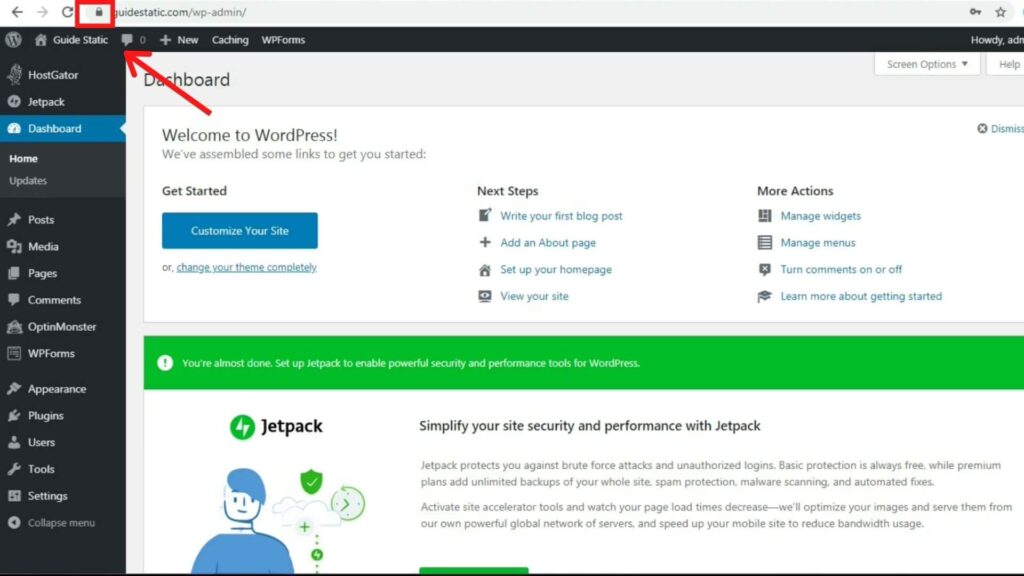
Now, open a new window, and type “yourdomainname.com/wp-admin”. For example, guidestatic.com/wp-admin. This will take you to the WordPress login page. Login using the credentials that you have set up.
Ok, perfect! In and around 4 minutes, we have successfully installed WordPress on our website. Now, we will move on with modifying the website.
3. Customize your website
Before moving on to installing the theme, make sure to check the SSL certificate (HTTPS) on your website. HostGator provides an SSL certificate for free that installs automatically on your website, so you do have to worry about it much.
1. Install a theme for your website
Ok! Now, we are going to install a theme for our website. There are a lot of themes available, and among them, my favorite is Kadence WP.
Kadence WP is a theme that is recently launched, and it is completely free, which is great news for beginners!
Be noted that, the theme you choose matters a lot in determining the success of your website. The theme you choose should be good in appearance and responsiveness. Moreover, it should also be mobile-friendly.
Ok.
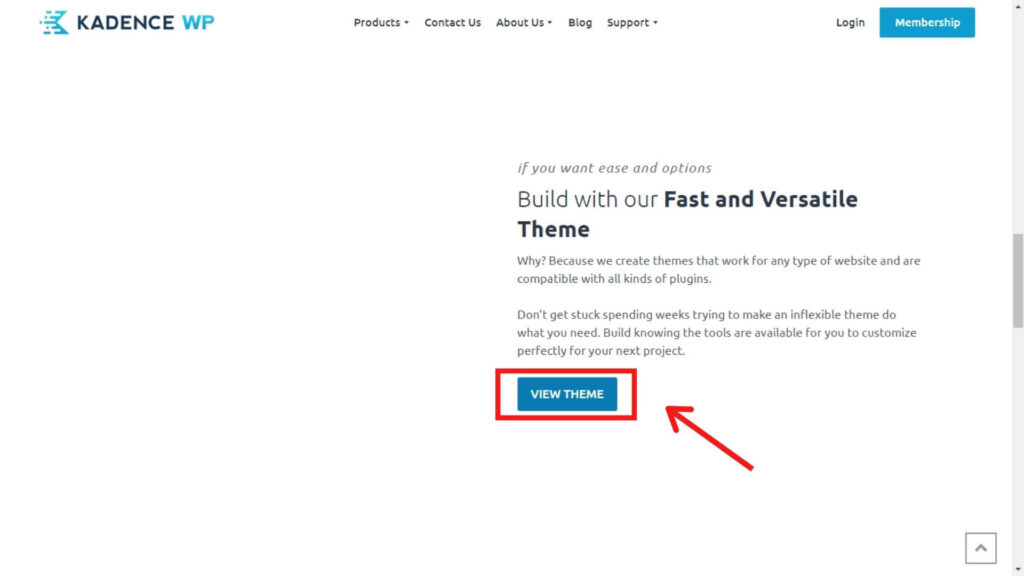
Now, click on ‘View Theme’.
Click on ‘Try Kadence for free now’.
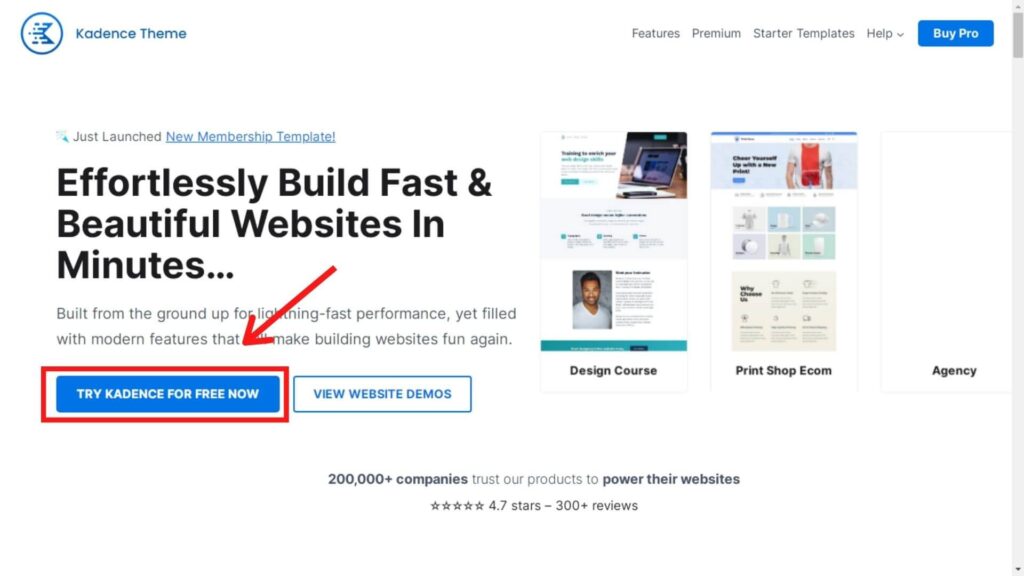
This will install a .zip file that contains the theme.
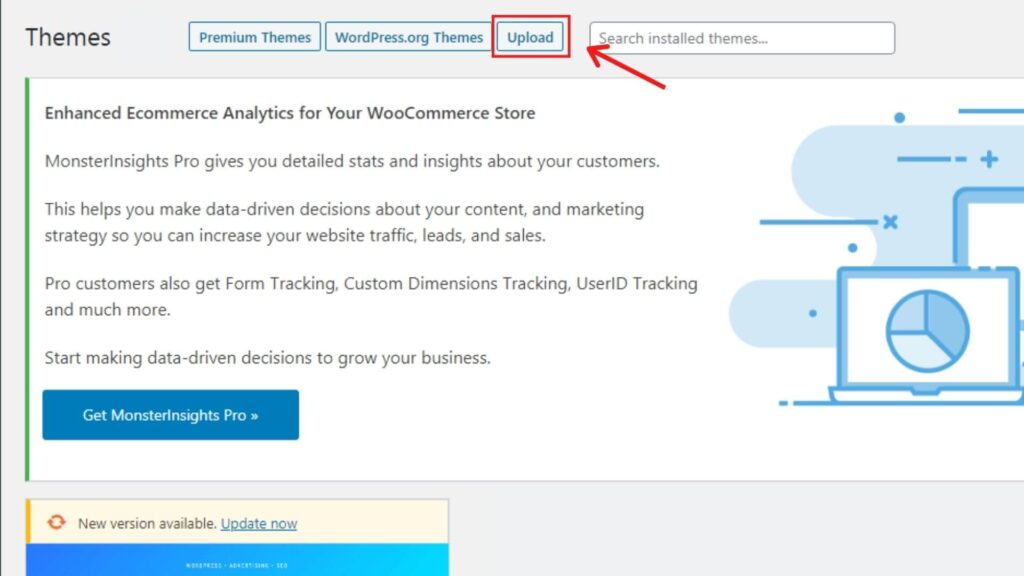
Go back to your WordPress dashboard, and in the side menu, hover your mouse over ‘Appearance’, and from the options, click on ‘Theme’.
Now, click on ‘Upload Theme’. Select the theme file from the folder in which it was installed on your computer.
2. Customize the theme
Once the theme is installed, you should move on with the customization of the theme. So, click on ‘Customize’.
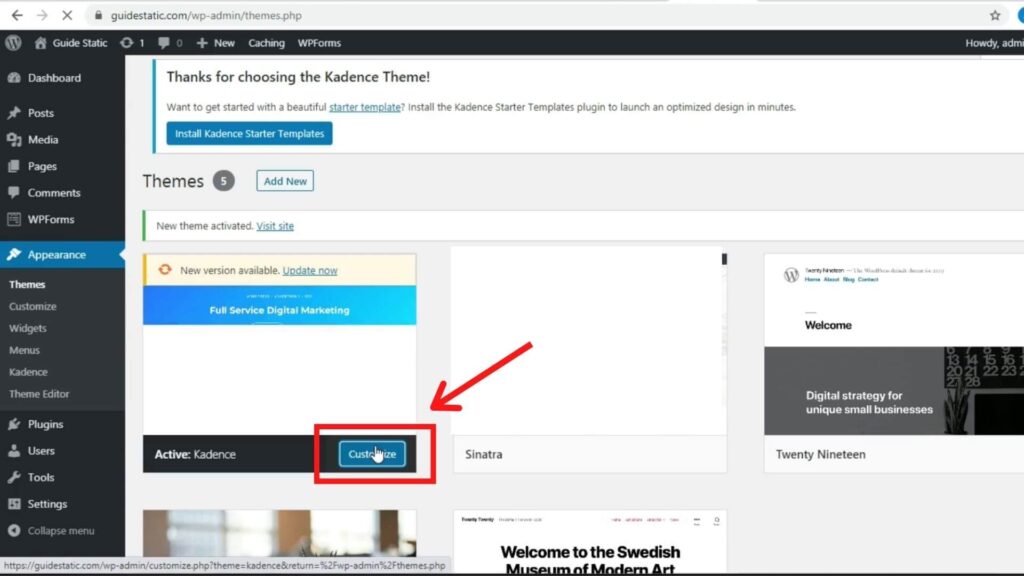
This will take you to a page from which you can customize the theme as you like.
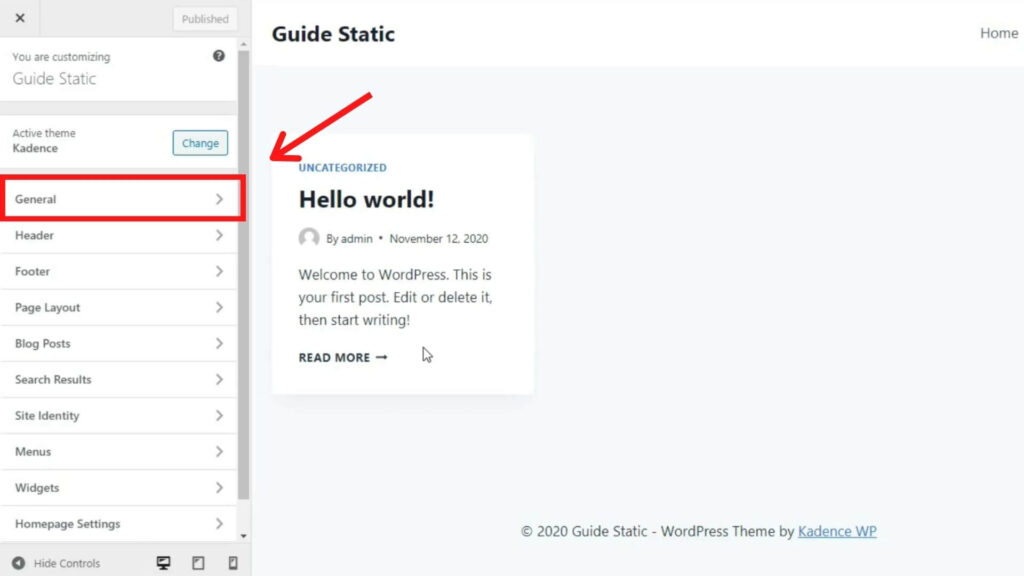
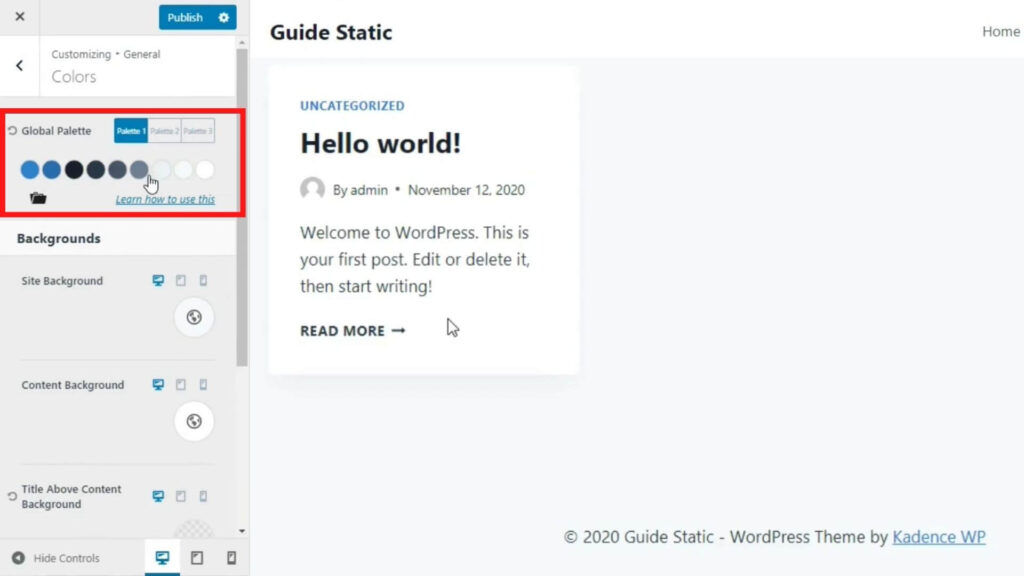
1. Changing colors and fonts
Kadence WP theme comes with three color palette options, from which you can modify the colors, and select the palette you like. This feature comes in very handy when writing blogs, creating new pages, modifying the website, etc. It helps in saving a lot of time.
To modify the font, from the customize page, click on General > Typography.
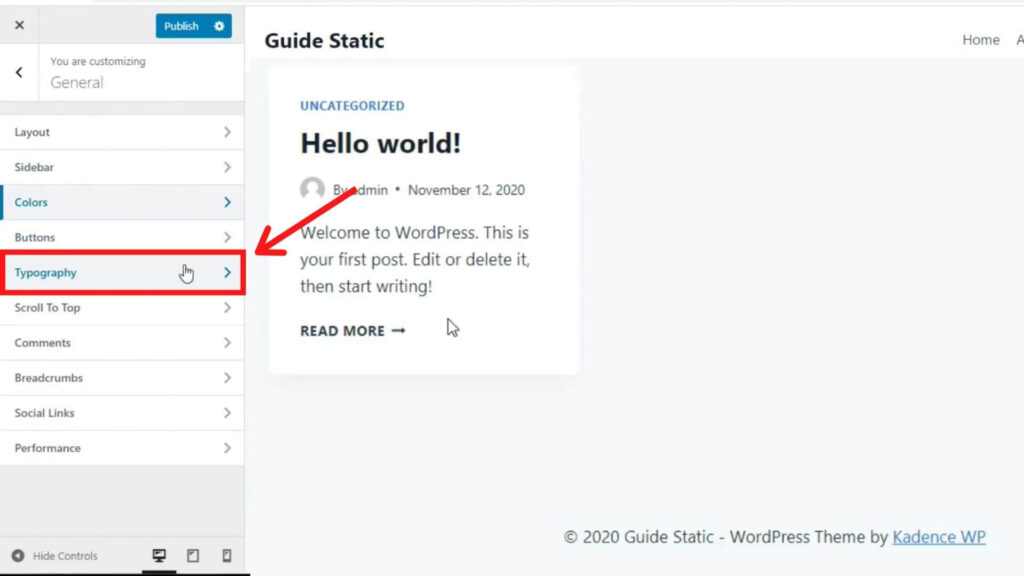
Select the font you like, and proceed further.
2. Upload the logo and site icon
You can create a logo and site icon using graphic designing tools like Canva. 250*250px / 500*500px are the dimensions that are the most suitable for a logo. 200*200px dimension suits well for a site icon.
You don’t have to worry about designing the logo, because it’s perfectly alright if you come up with a simple one. In fact, many top websites just have a simple logo design.
3. Header
To edit the header, from the customize page, click on ‘Header’.
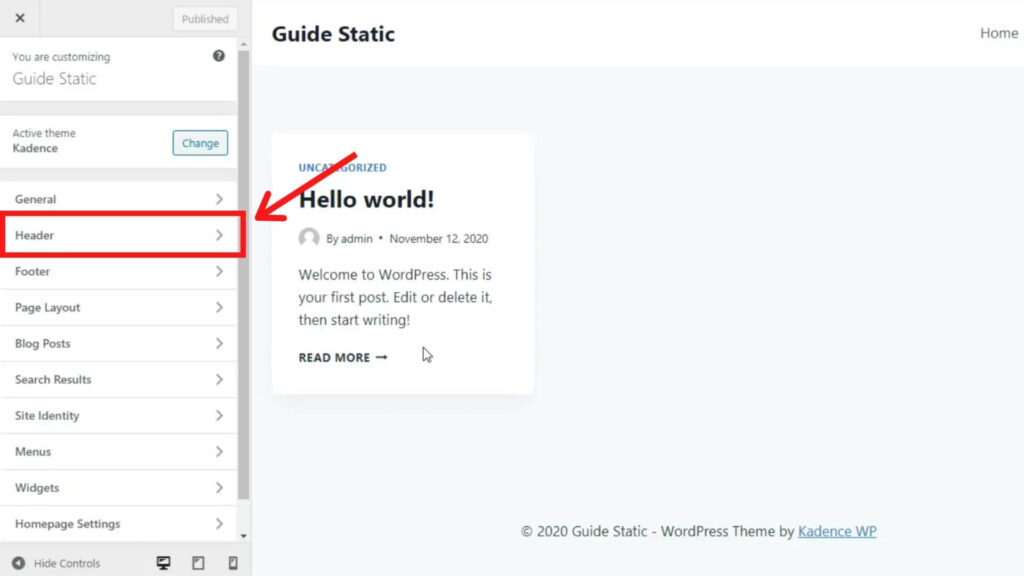
You can opt for a transparent header, sticky header, gradient header, etc. depending on your needs.
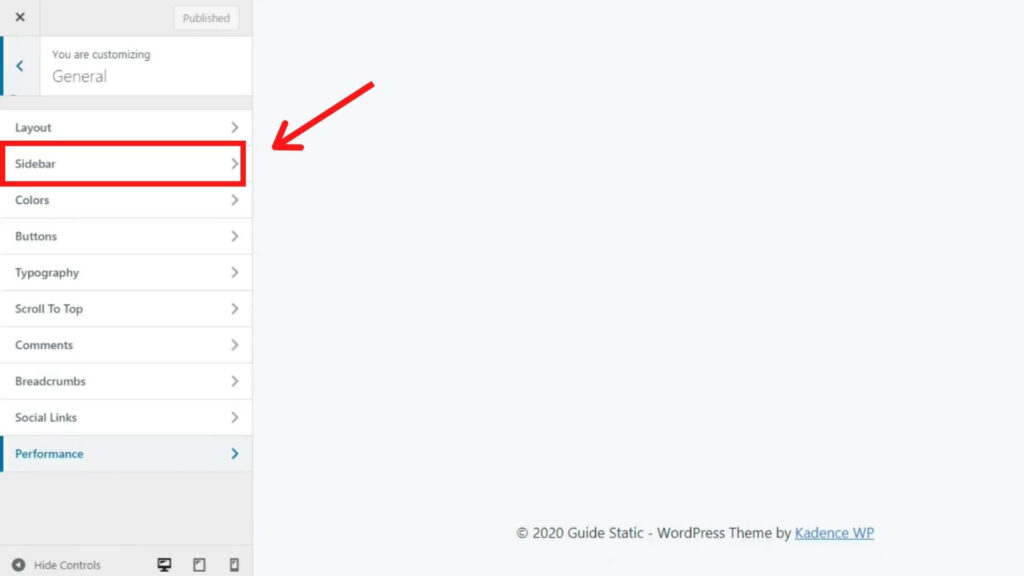
4. Sidebar
To modify the sidebar, from the customize page, click on General > Sidebar.
Ok! Now, some might think is sidebar needed for your website?
Good question!
If you are selling a product/service, having a sidebar will give a better exposure of your brand. It makes a random person visiting your website to be aware of your brand.
If you are not selling any product/service, you can display your Recent Posts in the Sidebar, which may make people to stay on your website for a longer time. Also, it may increase the page visits.
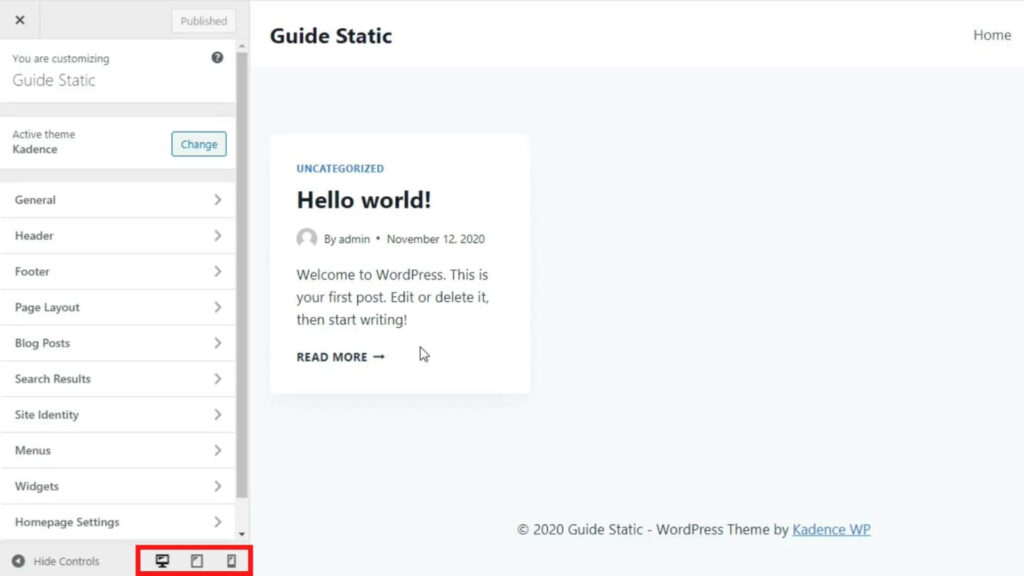
NOTE: Using the toggle options below, be sure to check how the website appears on your phone and laptop.
5. Menu options
In the WordPress dashboard, in the side menu, hover over ‘Appearance’. From the list of options, select ‘Menus’.
Below I have explained in detail the steps of creating a menu.
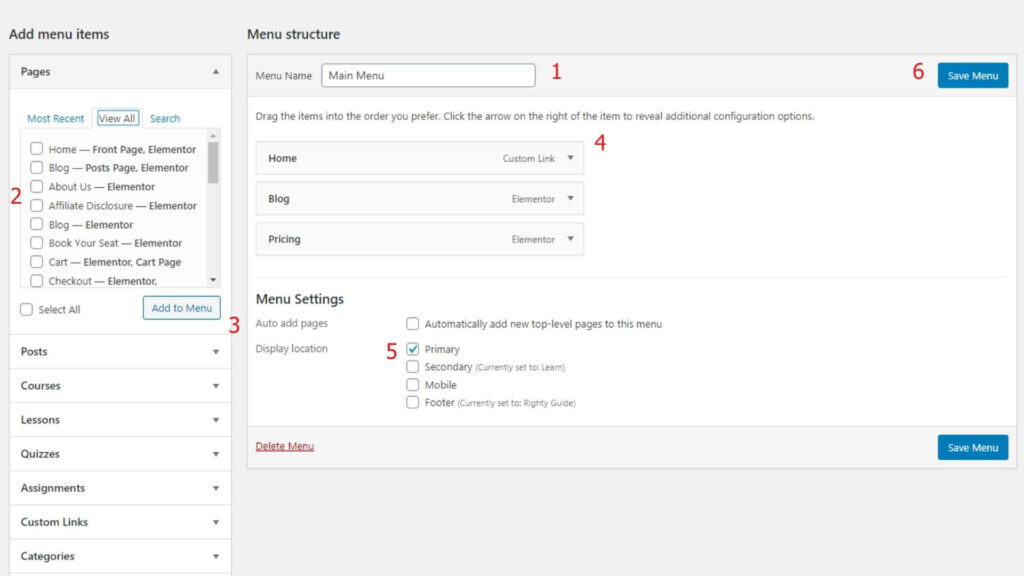
This image is of my actual website, Righty Guide. In our demonstration website (Guide Static), we haven’t added sufficient pages yet. So, I felt explaining this section through my actual website would be a good idea.
Ok!
- Give your menu a name. Visitors aren’t going to see the Menu Name, so it doesn’t matter much. But, giving appropriate names will make future reference easier.
- Select the pages that you want to add to the menu. I would suggest adding pages like Home, Blog, About, and Pricing in the Main Menu. Pages like Privacy Policy, Terms of Service, Disclosures, etc. can be added in the footer. This will give a cleaner appearance to your website.
- Click on ‘Add to Menu’. This will add the selected pages to the menu.
- Arrange the pages in the menu section as you wish.
- Select the display location. ‘Primary’ display location would usually be the menu that people see on the header of a website. ‘Footer’ display location would usually be the menu that people see towards the bottom of the website.
- Once everything is done, click on ‘Save Menu’.
7. Widgets
Once everything is done, click on ‘Publish/Update’.

As you have noticed, in and around 10 minutes, we have successfully created the website. Isn’t this awesome?!
A few years ago, creating a website used to involve CSS, JavaScript, and HTML, which would make a beginner feel overwhelmed. But, fortunately, that’s not the case now.
Now, we will move on with installing plugins.
4. Install plugins
Ok! Now, you might wonder what is the use of plugins in a WordPress website?
In general, plugins help in simplifying the process of creating and maintaining a website.
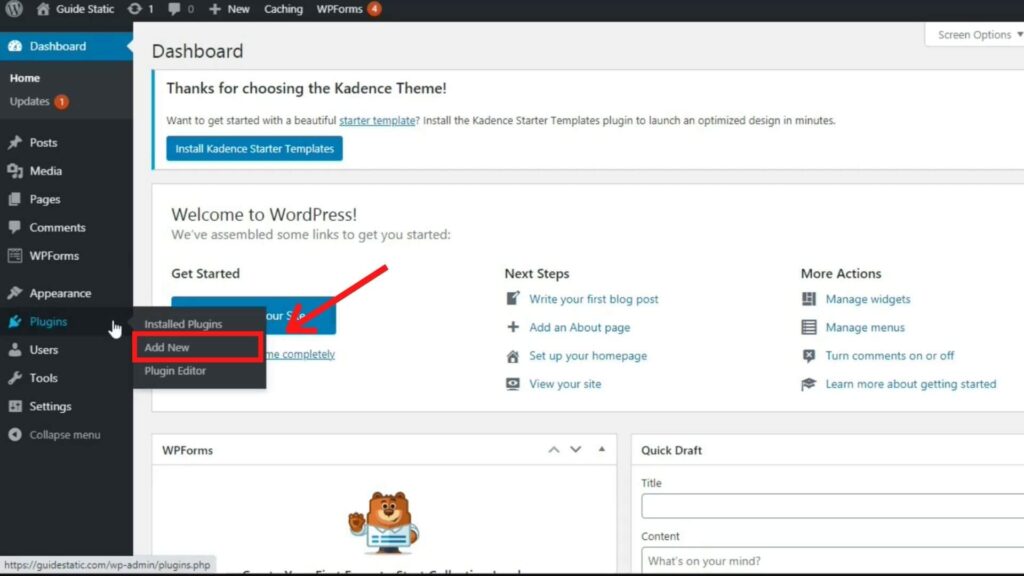
To install a plugin, in the WordPress dashboard, hover over ‘Plugins’. Then, click on ‘Add New’.
The following is the list of plugins that are the most essential for a WordPress website.
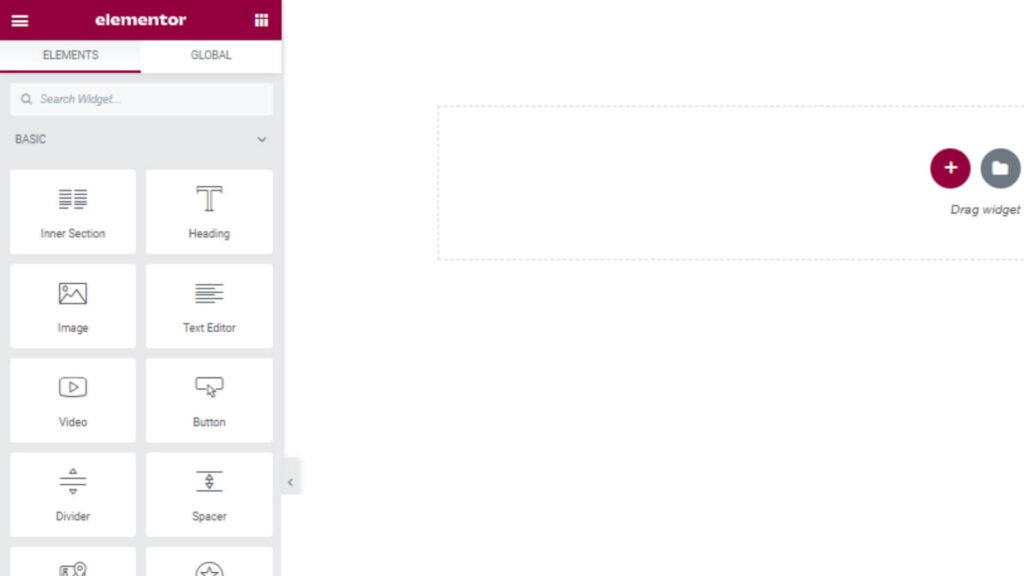
- Elementor: Elementor is the most popular page builder for WordPress, and there are various reasons for that. Some of them include the ease of customization it offers. Elementor is basically a visual page builder, which means, you can click on the element that you see on the page and edit it directly. It helps in saving a lot of time!
- Updraft Plus: Updraft Plus is a backup plugin through which you can backup your website.
- Post Type Switcher: Post Type Switcher is the plugin that you can use to switch a page between a page or post. For example, if you want to convert a page into a blog post, you can easily do so using this plugin. You can see the option to switch between a page and post in the WordPress Block Editor.
- Rank Math SEO: As the name suggests, Rank Math SEO is an SEO plugin that you can use to make your content SEO optimized. Depending on how well your content is SEO optimized, Rank Math will give you a score.
- WP Fastest Cache: WP Fastest Cache is a plugin that is used to cache the website. As you might know, caching helps in making your website load faster.
5. Add pages
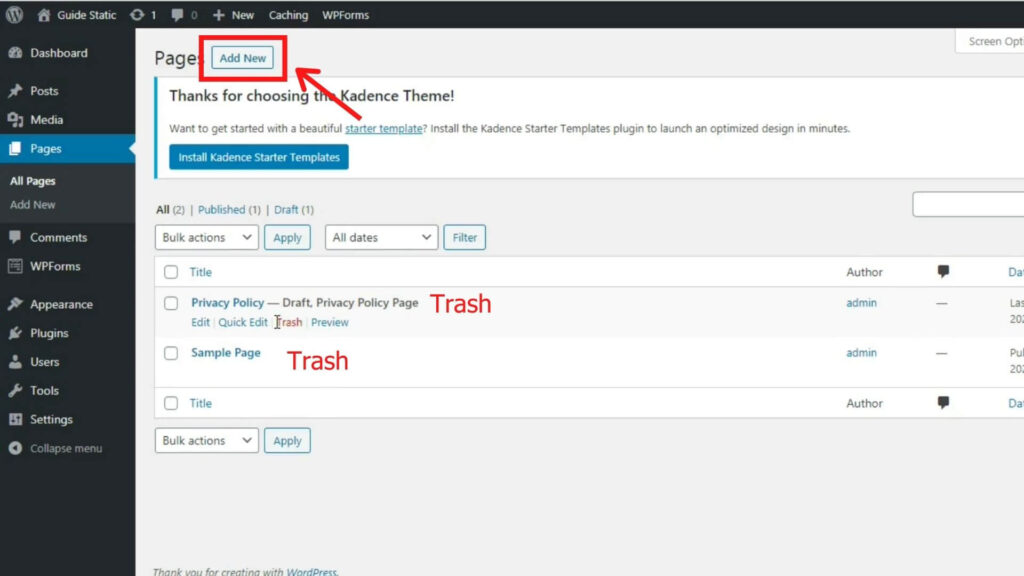
To add a page, from the WordPress dashboard, in the Side Menu, click on ‘Pages’. Trash/Delete the pages that were installed by default as in most cases they won’t be useful to us.
Now, click on ‘Add New’ to add a new page.
The following are the list of pages that are the most essential for a website:
- Home: Home page is usually the first page people across in a website. The first impression is the best impression. So, I would be highly recommend to make your home page as attractive and professional as possible.
- Blog: Blog page is the page that contains all your blog costs.
- About: About page is the page where you will explain to people about you and your brand.
- Pricing /Products/Services: If you sell a product, depending on the product you sell, you should create a pricing or product or service page.
- Refund Policy: If you sell a product, you may create a refund policy page where you explain to people about your refund or return policy.
- Privacy Policy: Privacy Policy page is usually the legal page where you set a rule for using your content, products, etc.
- Terms of Service: Terms of Service page is usually the legal page where you set terms and conditions for using your content, products, etc.
- Disclosure: If you promote a product, for example, an affiliate product, you may create a disclosure page.
- Contact: Contact page is used by the people to contact you.
6. Add posts
To add a post, from the WordPress dashboard, in the Side Menu, click on ‘Posts’. Trash/Delete the pages that were installed by default as in most cases they won’t be useful to us.
Now, click on ‘Add New’ to add a new post.
7. How to create pages?
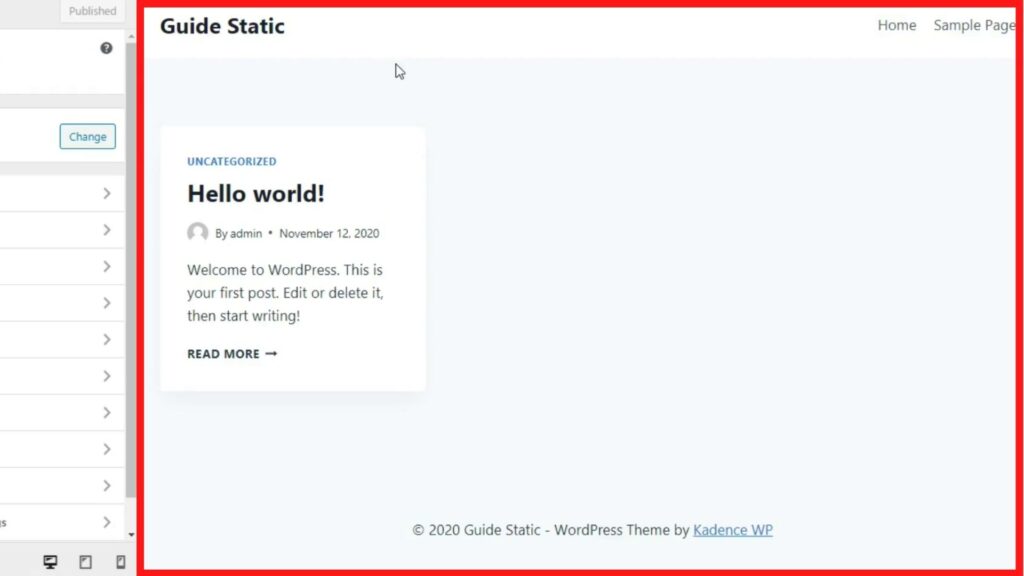
If you are using the Kadence WP theme, your default home page will look like this.
To make the page look super professional, I would suggest you opt for the free templates provided by Envato Elements and Elementor. There are a lot of free professional templates out there that will increase the attractiveness of your website by a huge margin.
Also, you can opt for the free templates that Kadence WP provides. To be honest, they look awesome!

Note: Try to use the same design and colors in almost all the pages and posts of your website. This will give your website a uniform look.
You can edit the template, add or remove an element using Elementor. Elementor Page Builder helps to make the process of editing a lot easier. From the WordPress Block Editor, to access Elementor Page Builder, click on ‘Edit with Elementor’.

Guys, do you want to hear a surprise? Before that, how does the blog you are reading look like? Be sure to comment below.
I hope that the blog is looking super attractive, and it’s not making you, readers, feel bored. Do you want to know how this blog was created? It was created using Elementor!!! Surprised, right!
So, yea, don’t underestimate the power of free tools. Paying doesn’t necessarily mean better always!
This is how the Elementor Page Builder looks like. You can drag and drop new elements, and remove the existing elements as you like.
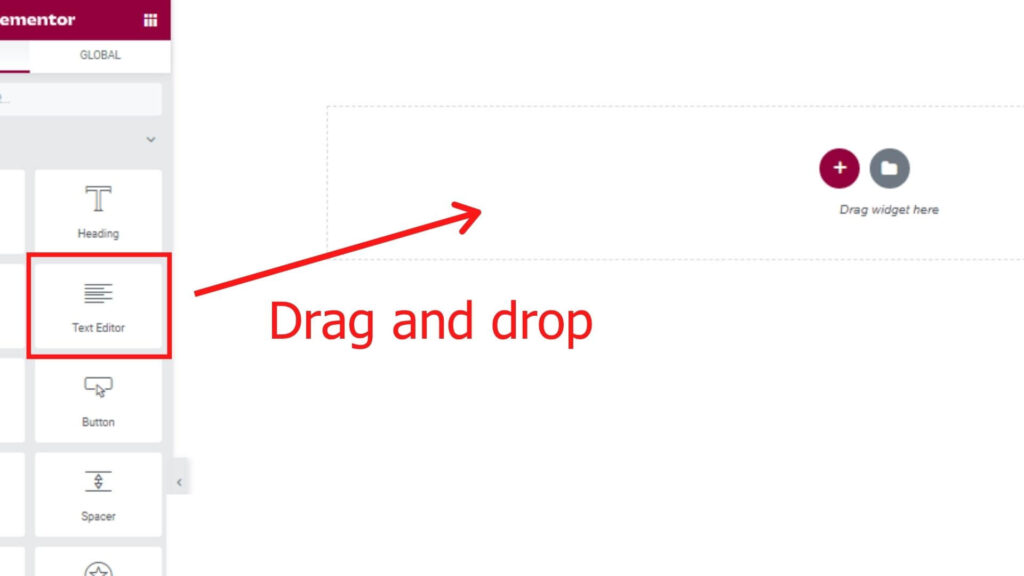
8. How to create posts?
The process of creating a post is pretty similar to creating a page. All you have to do is drag and drop the ‘Text Editor’ element, in which, you can start typing paragraphs.
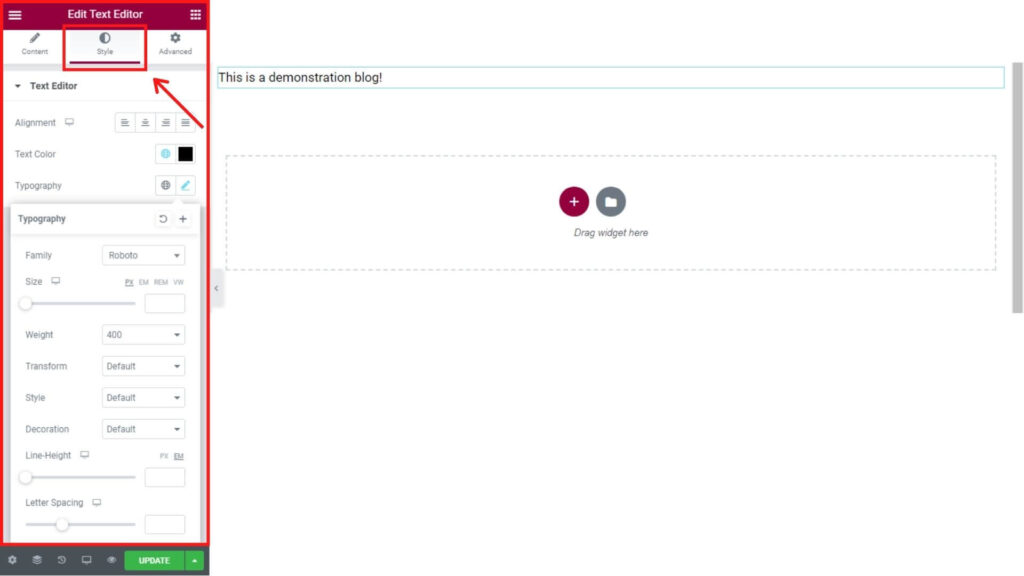
Here’s how you need to toggle between different heading types and paragraphs.

You can modify the typography as shown below.
Ok! I hope that you have clearly understood the method of creating pages and posts in a website.
9. E-Commerce
Are you interested in creating an e-commerce site? If so, you can pretty easily do so with WordPress.
If you are not interested in creating an e-commerce store, feel free to skip this part and move on to the next one.
How to create an e-commerce store using WordPress?
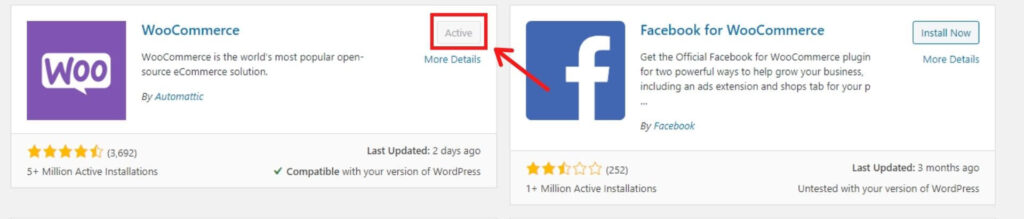
First, install a plugin called ‘WooCommerce’.
WooCommerce is a open-source plugin that suits businesses of all levels. It’s easy to use, and it comes with many customizing options, which is great for e-commerce store owners.
The following are the steps to create an e-commerce store using WordPress:
- Make your website attractive: The attractiveness of a website matters even more when running an e-commerce store. I recommend you to use the Kadence theme along with the template from Elementor or Envato Elements to build your store. Only using the Kadence theme will make your store look too formal, which is not the characteristic of an e-commerce store.
- Add products: Once the site is ready, you should add the products that you want to sell. Bonus tip: Make sure to sell your products at a competitive price so that people will be attracted to the products you sell.
- Set up the payment gateway: Woocommerce offers support for various payment methods and gateways. Select the one that suits you the best.
- Check if everything is fine: If you have run the Woocommerce setup wizard, the shop, cart, and checkout page will be installed by default. As the name suggests, ‘Shop’ is the page where your products will be listed. ‘Cart’ is the page where the products that people add will be displayed. ‘Checkout’ is the page where people can complete their order.
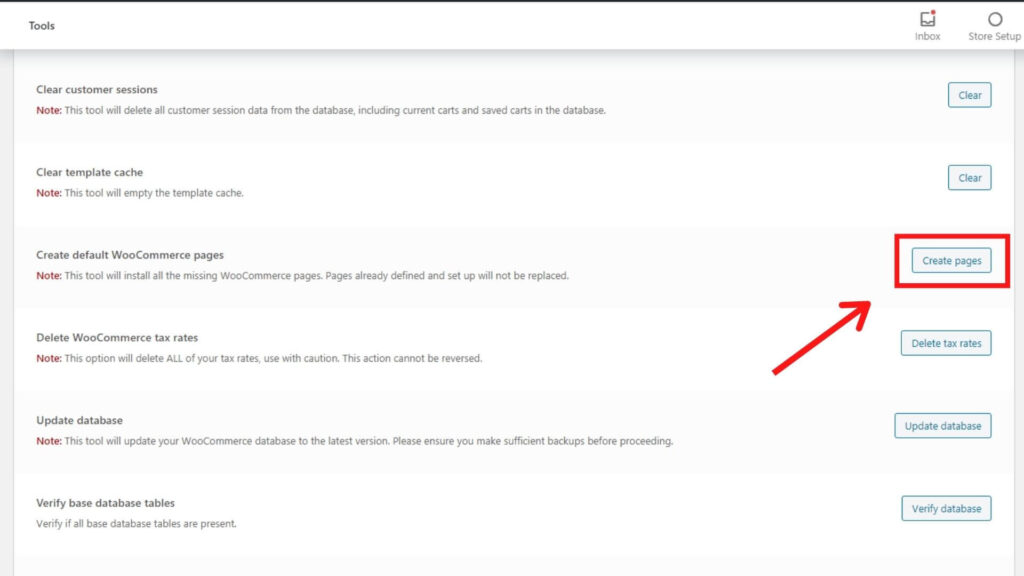
If you haven’t run the setup wizard, don’t worry. In your WordPress Dashboard, in the side menu, hover your mouse over ‘WooCommerce’. From the options, select ‘Status’. Then, click on ‘Tools’. Scroll down the page, and look for the ‘Create default WooCommerce pages’ section. Click on ‘Create Pages’.
- Check the status of an order: To check the details and status of an order, from the WordPress dashboard, in the Side Menu, hover your mouse over ‘WooCommerce’. Then, click on ‘Orders’.
The status of the order will be in ‘Processing’ by default. Depending on the situation, you can either cancel, refund, or change the status of the order to ‘Completed’.
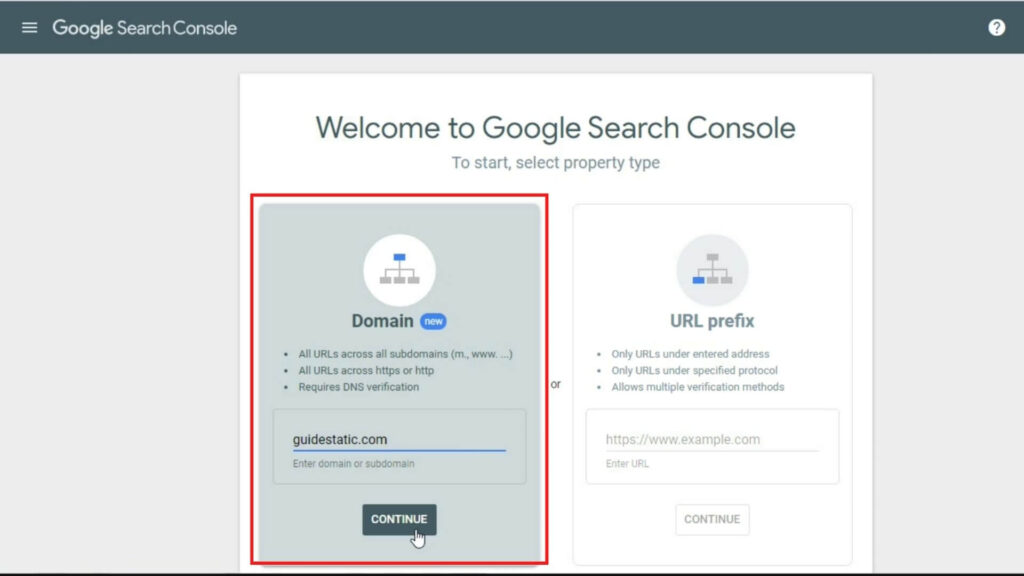
10. Index the website on Google
The last step of creating a website is to index it on Google. Without indexing the website on Google, the search engine won’t be able to recognize your site, so, as a result, your website won’t rank on the search results.
So, please, don’t forget to index your website on Google!
Steps to get a website indexed on Google:
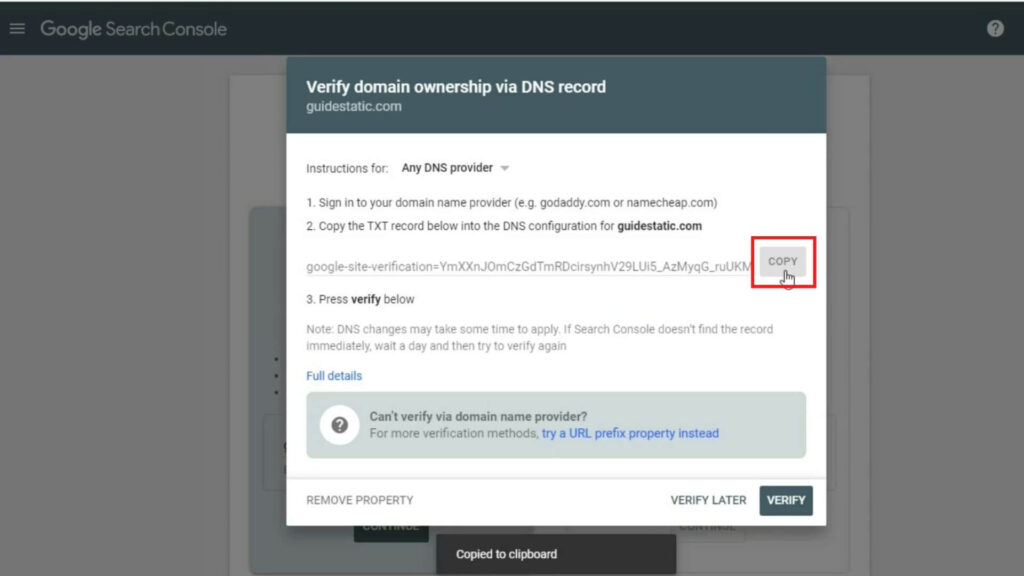
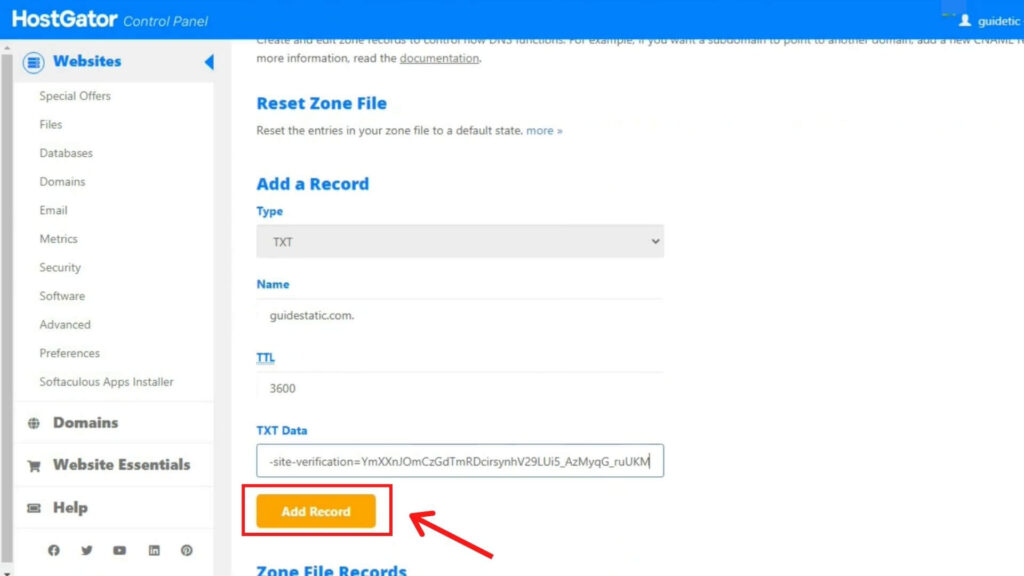
- Next, copy the TXT record.
- Now, login to your HostGator control panel to add the TXT record.
- From the HostGator control panel, scroll down and click on ‘Advanced Zone Editor’.
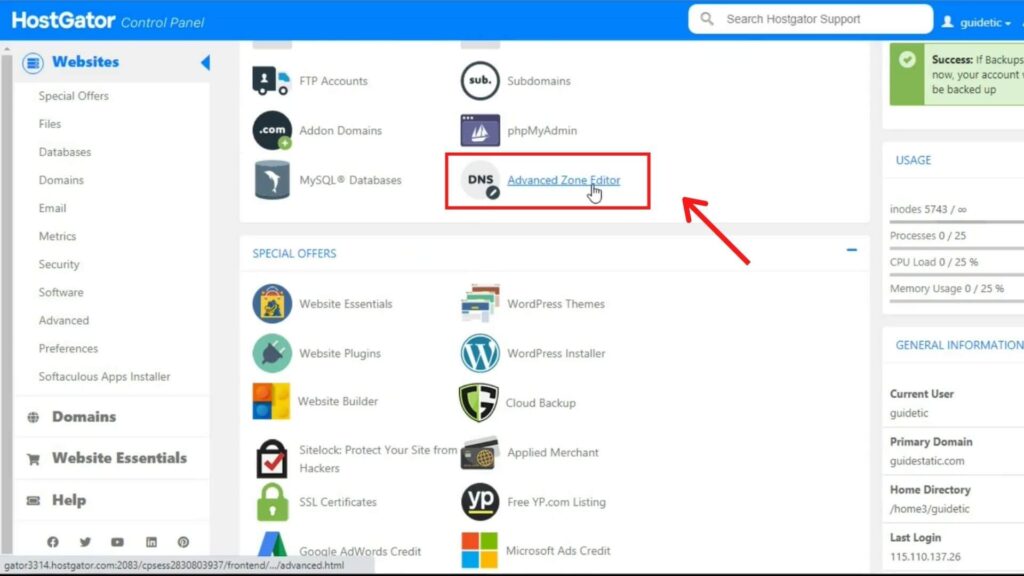
- Now, under ‘Add a Record’, do the following:
- Type: TXT
- Name: yourdomainname.com (for example, guidestatic.com)
- TTL: 3600
- TXT Data: Paste the code that you have copied from Google Search Console.
- Once you have entered the required data, click on ‘Add Record’.
- Now, go to Google Search Console, and click on ‘Verify’.
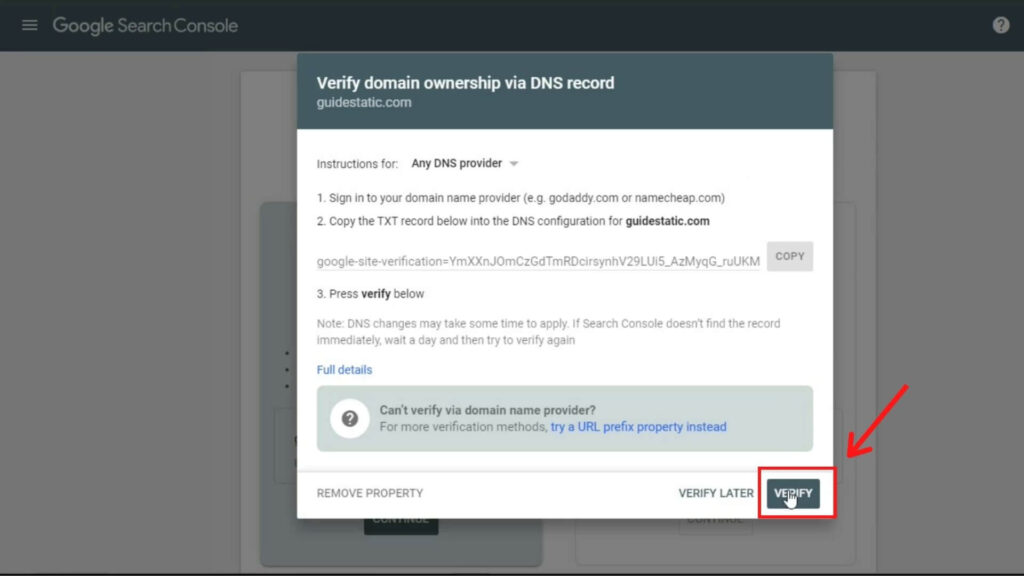
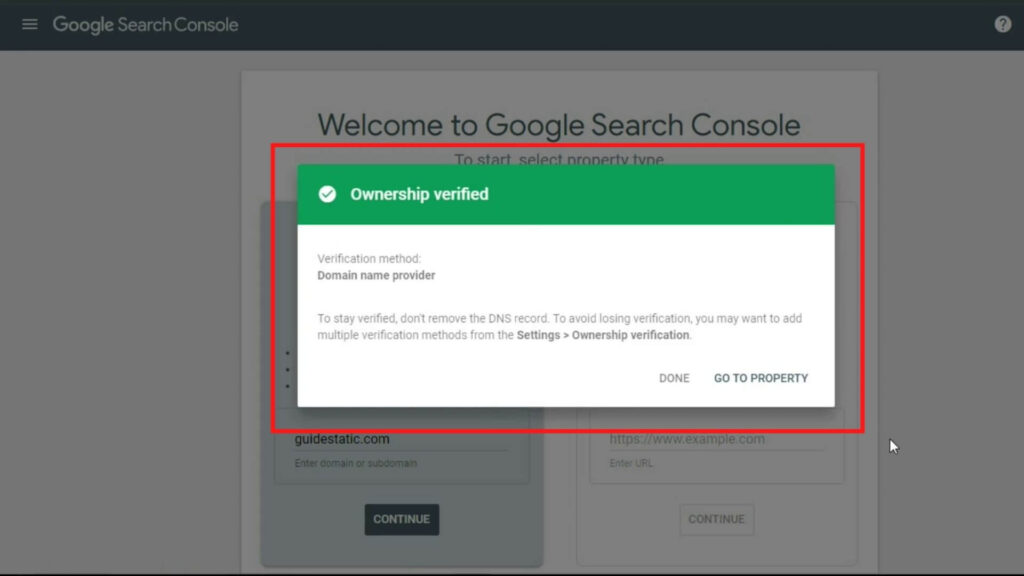
- Great! We have verified the site identity, and our website will be indexed on Google.
I hope that you have clearly understood the method of indexing the website on Google.
Conclusion
This is the end of this step-by-step guide to creating a website.
I hope that you have clearly understood the method of creating a website, and I hope that it was useful to you.
Before concluding this guide, I would like to summarize the topics discussed in this guide:
- Be sure to choose a good domain name, because the domain name is the address of your website on the internet. It is what represents you and your brand.
- Once you purchase the hosting from HostGator, install WordPress from the HostGator Control Panel.
- Next, move on with customizing your website. Make sure to choose a theme that is responsive, attractive, and professional.
- Install Elementor Page Builder to customize the website.
- Add the necessary pages and posts to your website.
- If you want to make your website as an e-commerce site, install the WooCommerce plugin from the WordPress plugin repository. Configure the plugin, and add the products you want to sell.
- Index your website on Google.
