How to install a plugin in WordPress: A detailed guide!
-
Abdul Wadood
If you have a WordPress website, you’ll probably know the importance of plugins.
Plugins are applications that increase the features of your WordPress website. If you aren’t a developer, you’ll need the help of plugins to design your website, optimize your website, set up redirections, create a contact form, etc.
Ok.
Though installing a WordPress plugin is pretty easy, many new users struggle to install them on their website.
To solve this issue, I decided to write a blog on how to install a plugin in WordPress.
Let’s begin!
Table of content:
Installing plugins directly
In WordPress, you can install plugins in different ways.
The first and the easiest way of installing plugins is through the WordPress admin area. Here are the steps to do so.
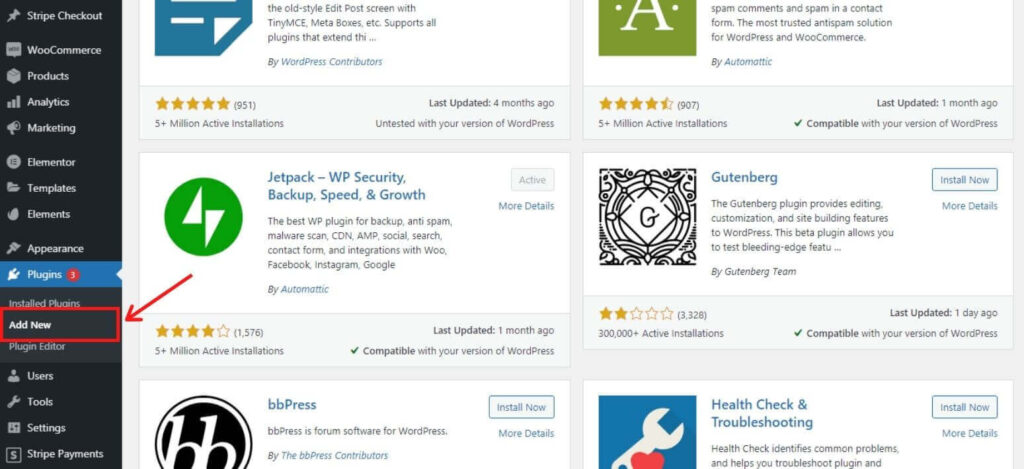
Step #1: From the WordPress dashboard, click on Plugins → Add New.
For demonstration, I will install the “Contact Form 7” plugin. This plugin is used to create professional forms.
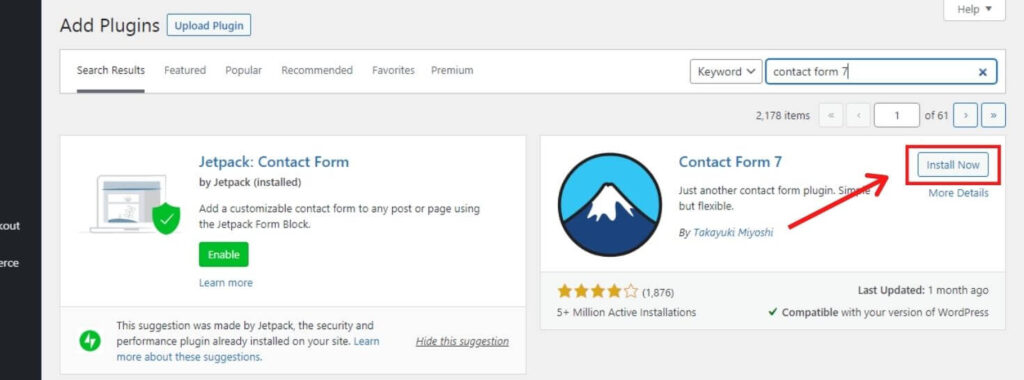
Step #2: In the search bar, type the name of the plugin you want to download.
In my case, I’ll type “Contact Form 7” plugin in the search bar.

Step #3: Once you find the plugin, click on “Install Now”.
Step #4: Once the plugin is installed, click on “Activate”.
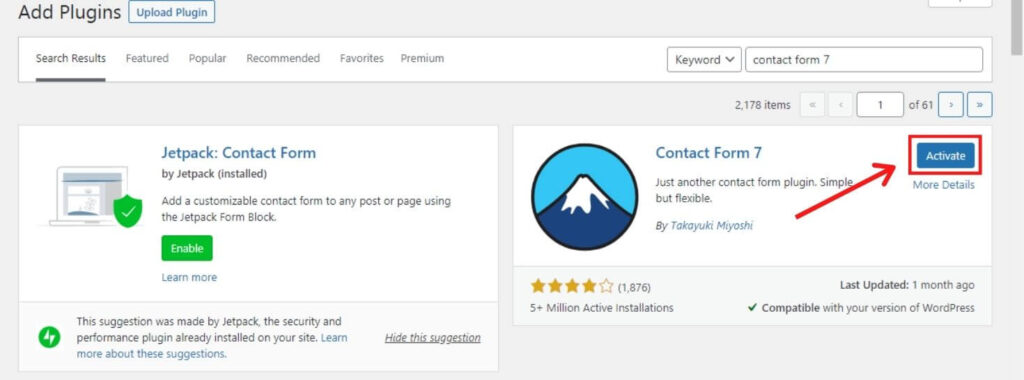
Once the plugin gets activated, you can start using it.
Note: An installed plugin won’t work until you activate it.
I hope that you understood the method of installing plugins through the WordPress admin area.
Some plugins, especially those recently launched, won’t be available in the WordPress plugin directory. Also, WordPress won’t list the paid plugins in their plugin directory. In such cases, we have to install the plugin using the method explained below.
Installing plugins through “Upload”
Step #1: Install the plugin you want from the internet. If you’re purchasing a paid plugin, you can find and install it from their respective website.
For demonstration, I will download the “Contact Form 7“ plugin from the internet.
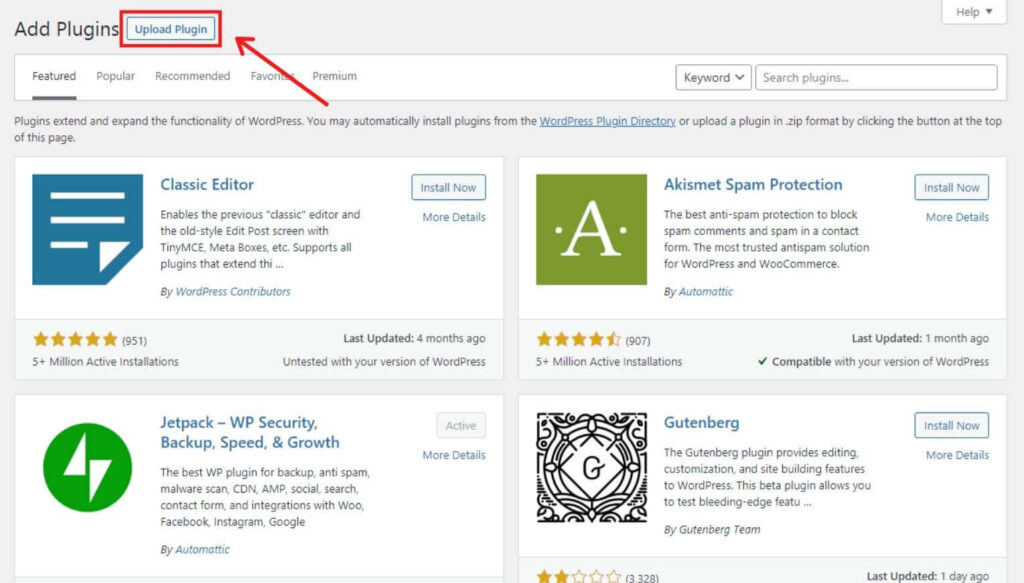
Step #2: Once the plugin is downloaded, go to the WordPress plugin page and click on “Upload Plugin”.
Step #3: Next, click on “Choose File”.
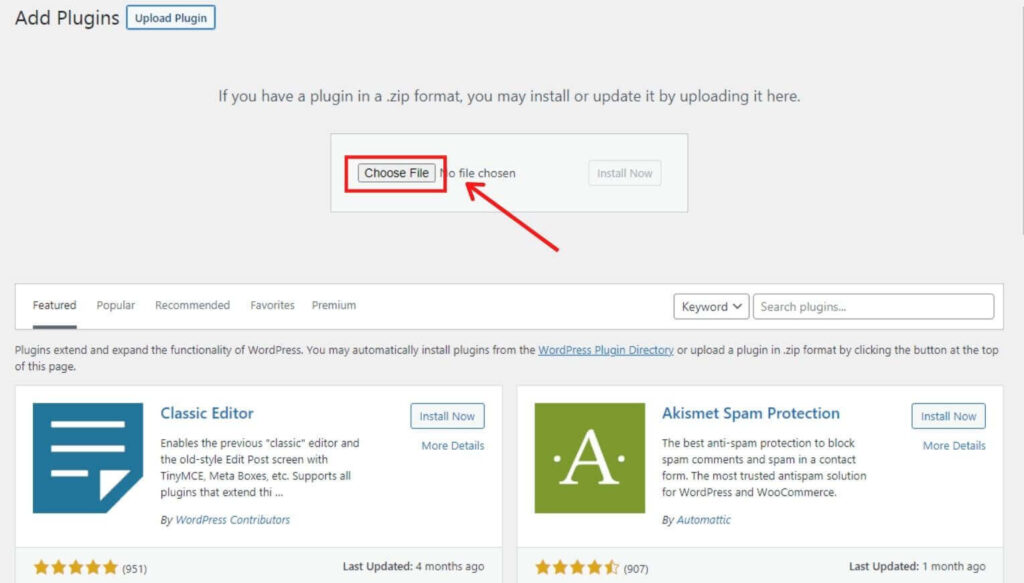
Step #4: Select the plugin from your computer.
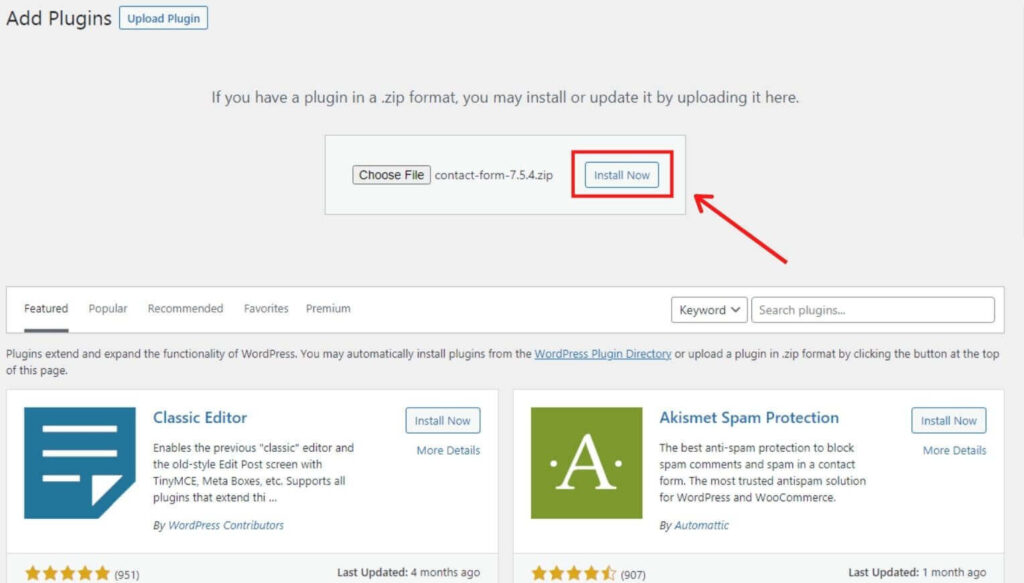
Step #5: Once the plugin is selected, click on “Install Now”.
Step #6: Once WordPress installs the plugin, click on “Activate Plugin”.
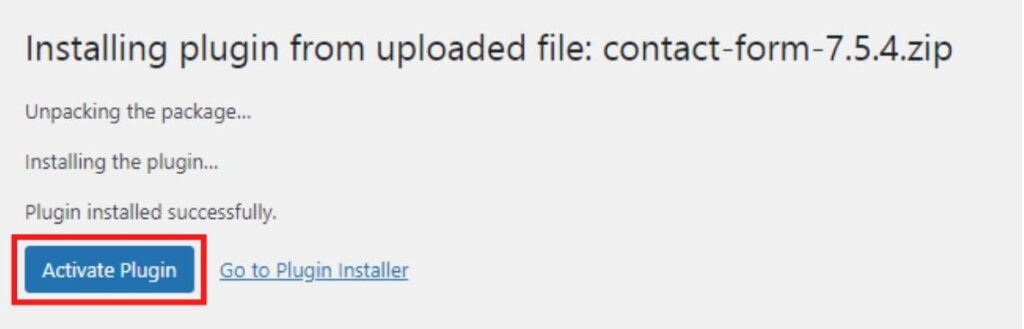
Once the plugin is activated, you can start using it.
Installing plugins through FTP
You can use this method to install the plugins when the WordPress Plugin Directory is down.
Also, if you’re installing a custom WordPress plugin, you may need to install it through FTP.
FTP stands for File Transfer Protocol.
This method of installing the plugins is pretty complicated compared to the first two. However, you’ll use this method rarely. So, it’s not an issue.
Step #1: When you download a plugin, it’ll be installed as a ZIP file. So, you have to extract (unzip) the plugin files.
Step #2: Upload the plugin folder to your FTP (hosting) server.
Step #3: Once the plugin is uploaded, activate it in WordPress.
Additional knowledge
Below, I’ve listed some additional information that will benefit you.
1. Difference between WordPress.com and WordPress.org
If you’re using WordPress.com, you won’t be able to install the plugin unless you upgrade to their business plan. The business plan costs about $299/year, which is quite expensive for beginners to afford.
So, if you’re on a tight budget, we recommend you opt for WordPress.org. It is open-source and completely free. By opting for WordPress.org, all you need to have to proceed is a domain name and hosting. HostGator offers both of them at an affordable price.
When you purchase the hosting, you can install WordPress to your site from HostGator itself. Also, if you opt for yearly plans, HostGator lets you choose a domain name that is free of cost for a year.
1. Difference between WordPress.com and WordPress.org
If you’re using WordPress.com, you won’t be able to install the plugin unless you upgrade to their business plan. The business plan costs about $299/year, which is quite expensive for beginners to afford.
If you’re on a tight budget, I recommend you opt for WordPress.org. It’s open-source and completely free. Moreover, with WordPress.org, all you need to create a website is domain name and hosting. Thankfully, HostGator offers both of them at an affordable price.
2. Don’t install too many plugins
The loading speed of your website is one of the crucial factors that affect your website’s SEO.
Plugins are applications. If you install too many of them, they will slow down your website. So, to have a fast-loading website, just install the plugins that you absolutely need.
3. It is better to delete inactive plugins
There is a misconception that inactive plugins slow down your website. But, actually, it doesn’t.
When a page is requested to load from WordPress, it only loads the active plugins and completely ignores the inactive plugins.
However, it’s better to delete the inactive plugins because it reduces the clutter on the plugins page.
4. How to uninstall plugins?
Having seen how to install a plugin, let’s now see how to install the plugin.
Thankfully, uninstalling the plugin is quite simple. The following are the steps to do so.
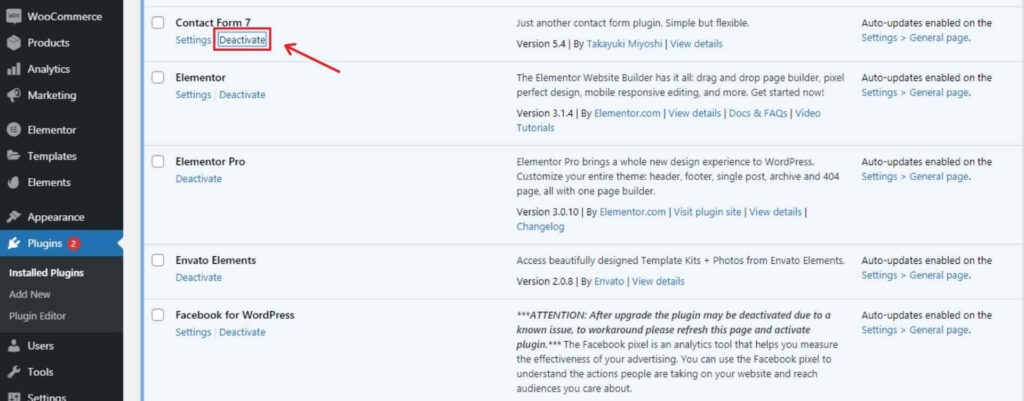
Step #1: From the list of plugins, select the plugin that you want to uninstall.
For demonstration, I have chosen to uninstall Contact Form 7 plugin.
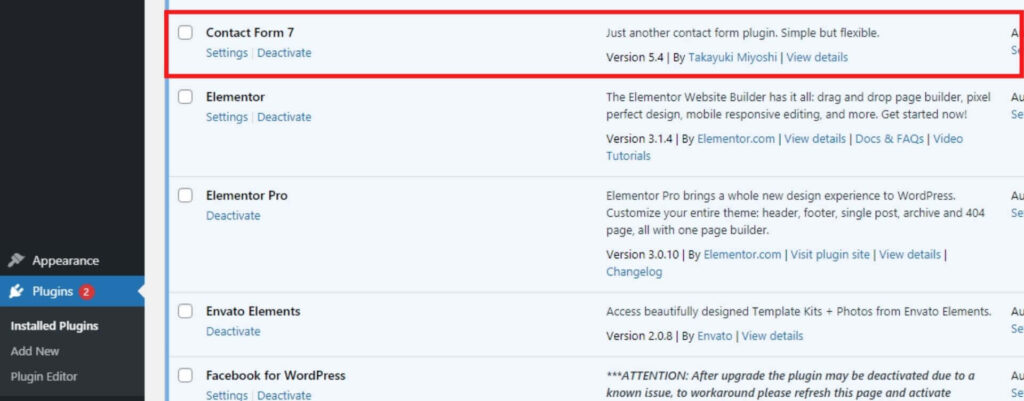
Step #2: Click on “Deactivate”.
Once you click on deactivate, the plugin will become inactive, and it will be displayed in white color. Also, the inactive plugin will have the delete option.
The active plugins will be displayed in blue color. Using the color, you can easily differentiate between active and inactive plugins.
Step #3: Click on “Delete”.
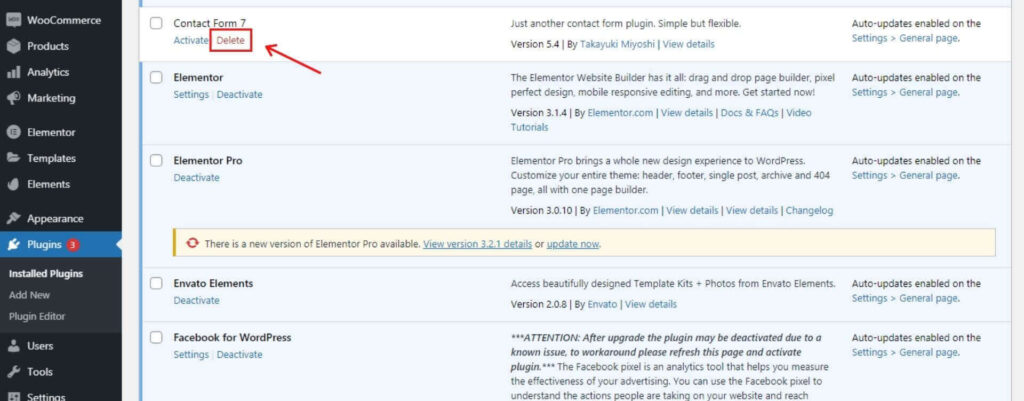
Step #3: Click on ‘Delete’.
Once you click on delete, the plugin will be deleted. In my case, the “Contact Form 7” plugin has been deleted.

Conclusion
I hope this blog gave you a clear understanding of installing plugins on WordPress.
Plugins can simplify your tasks. Having said that, you should have fewer plugins on your website.
If you install too many plugins, your website will become slow, negatively affecting SEO performance.
If you’ve any questions about installing WordPress plugins, let’s discuss them in the comment section below.
